Ever wondered how to achieve perfect straight edges or wished you could get rid of that uneven join in the round? This list of five knitting tips and hacks explains how to solve these problems and more!
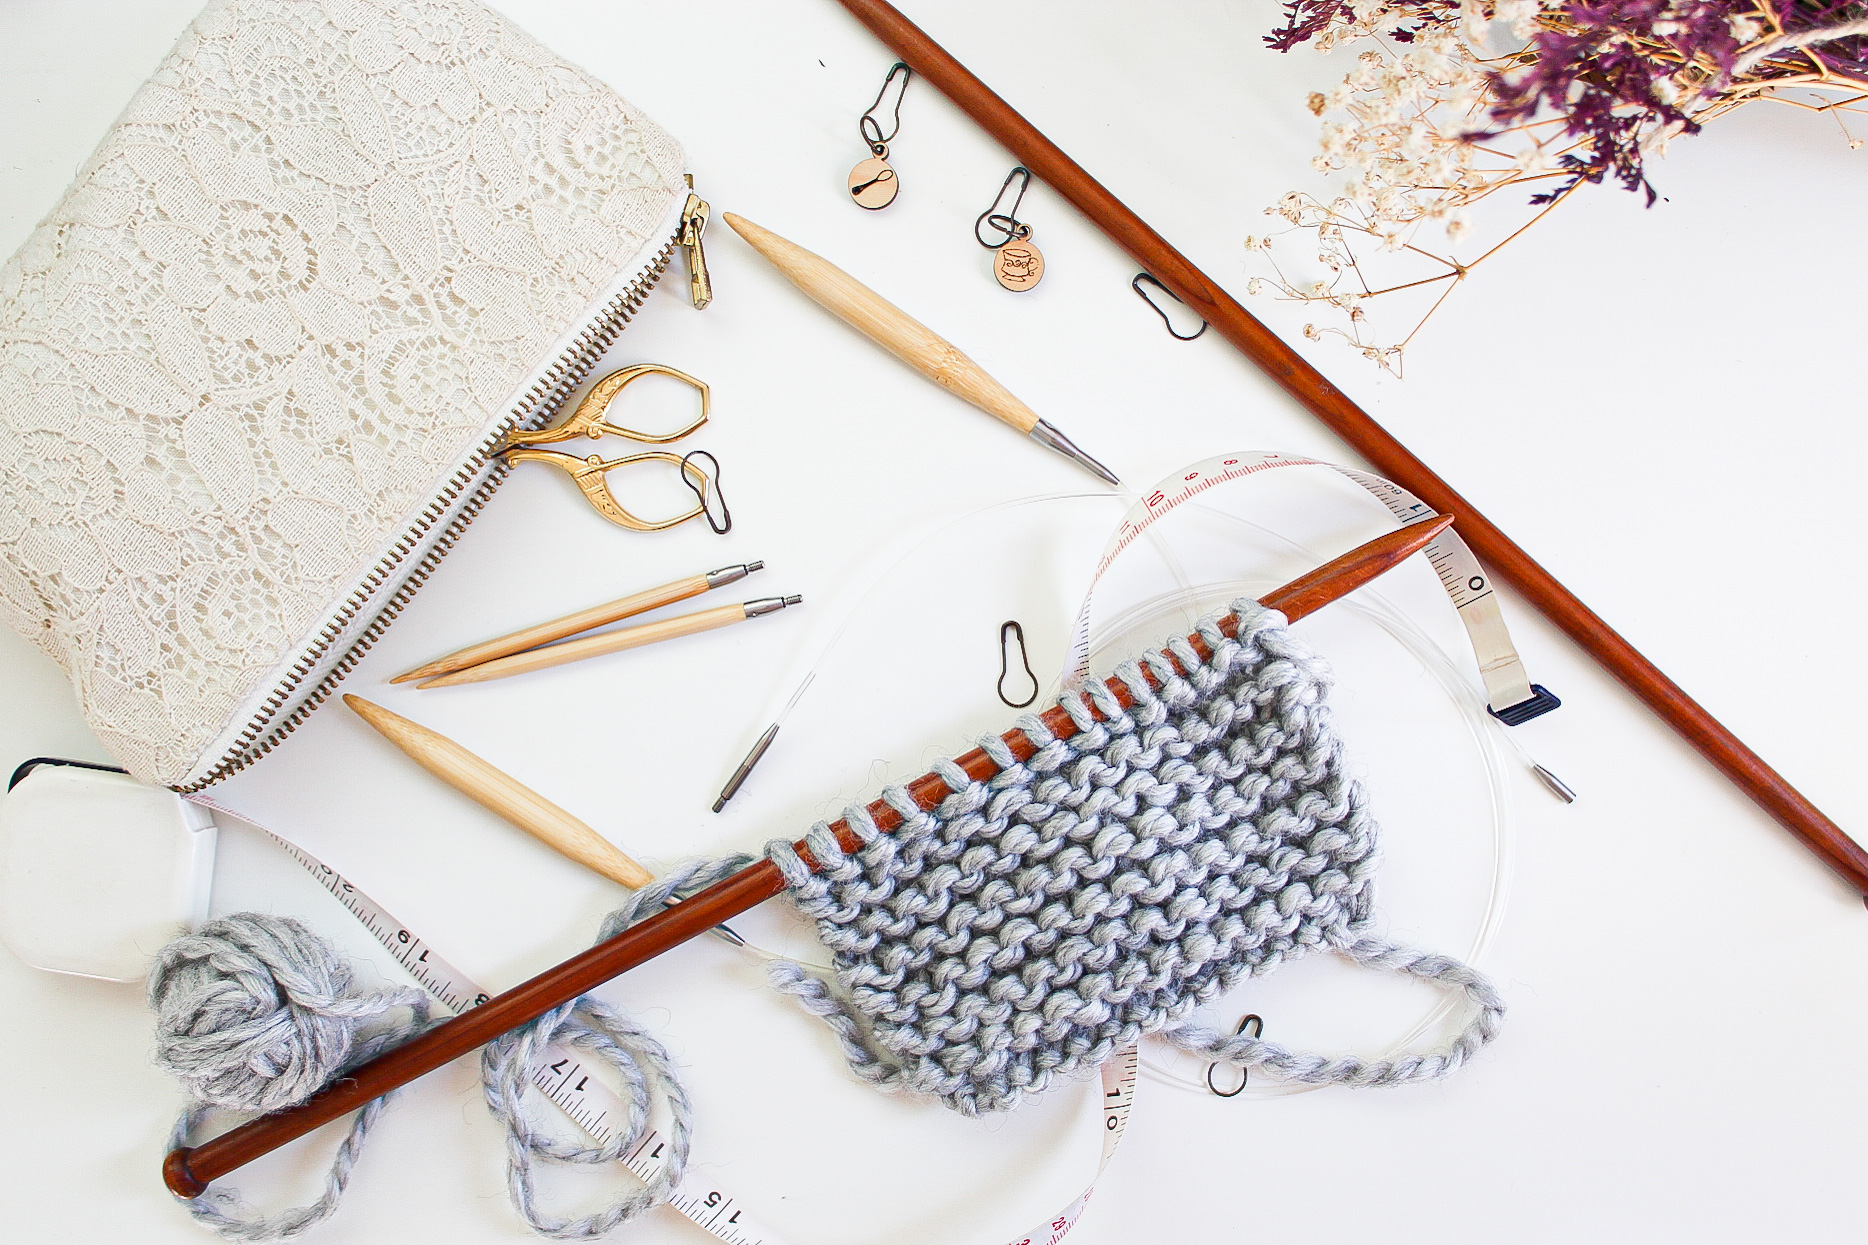
Let’s Get Learning
This list is great for beginners and experienced knitters alike. As an experienced knitter, I am always looking for new and easier ways to do things because some parts of knitting can get frustrating and little tricks can make the experience so much more enjoyable.
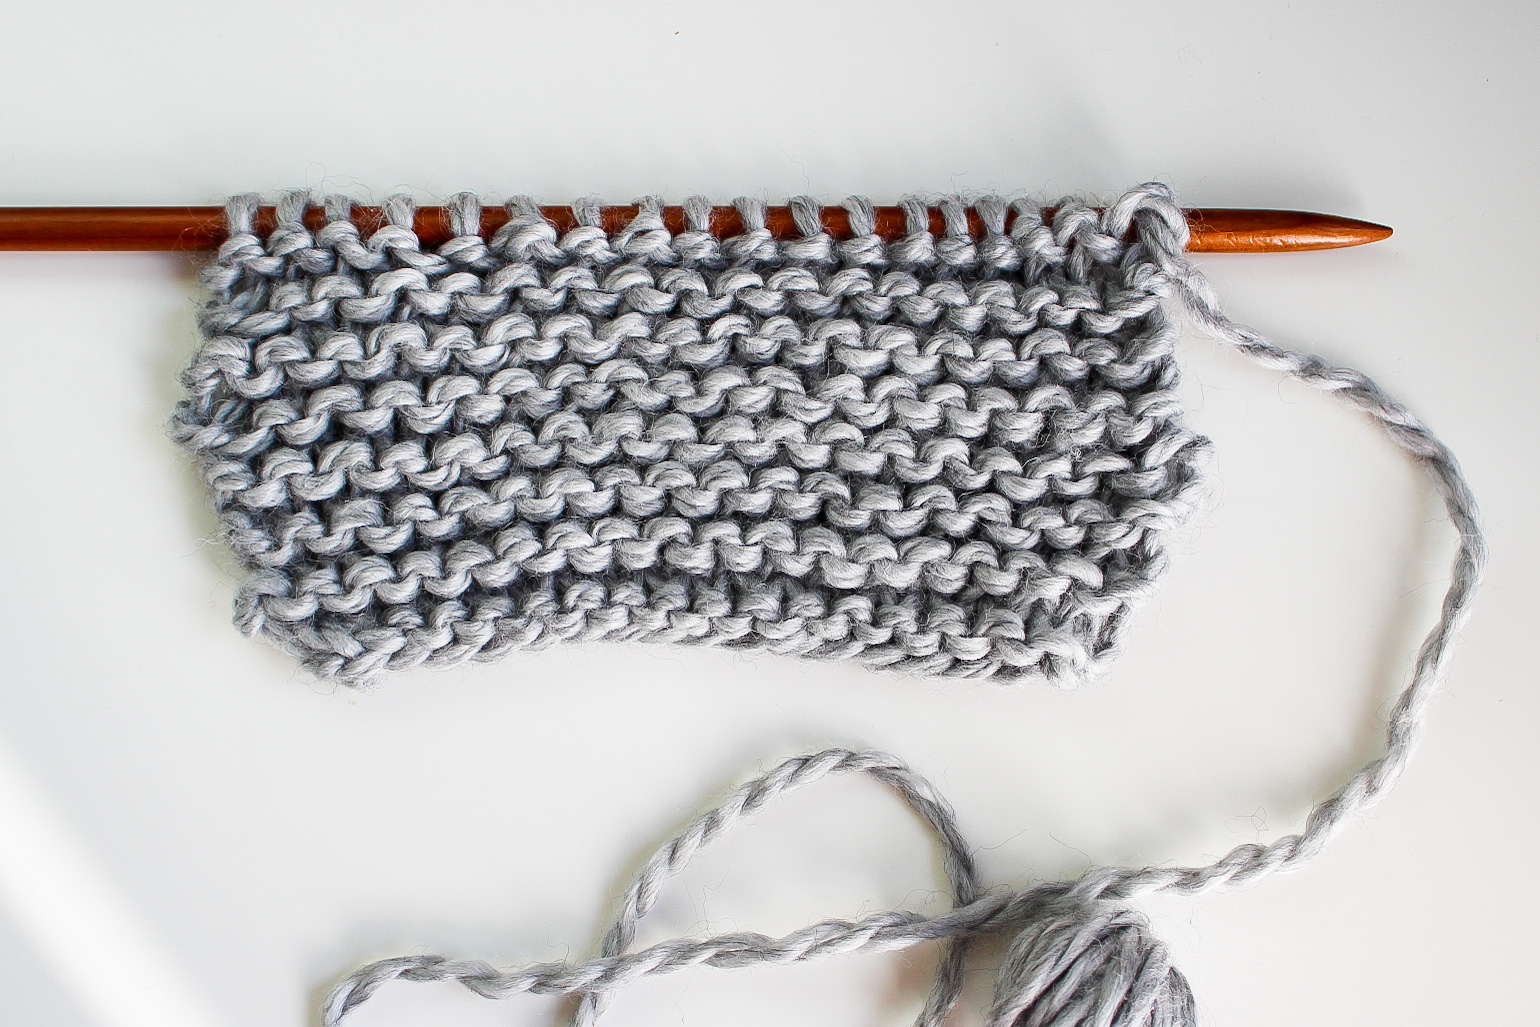
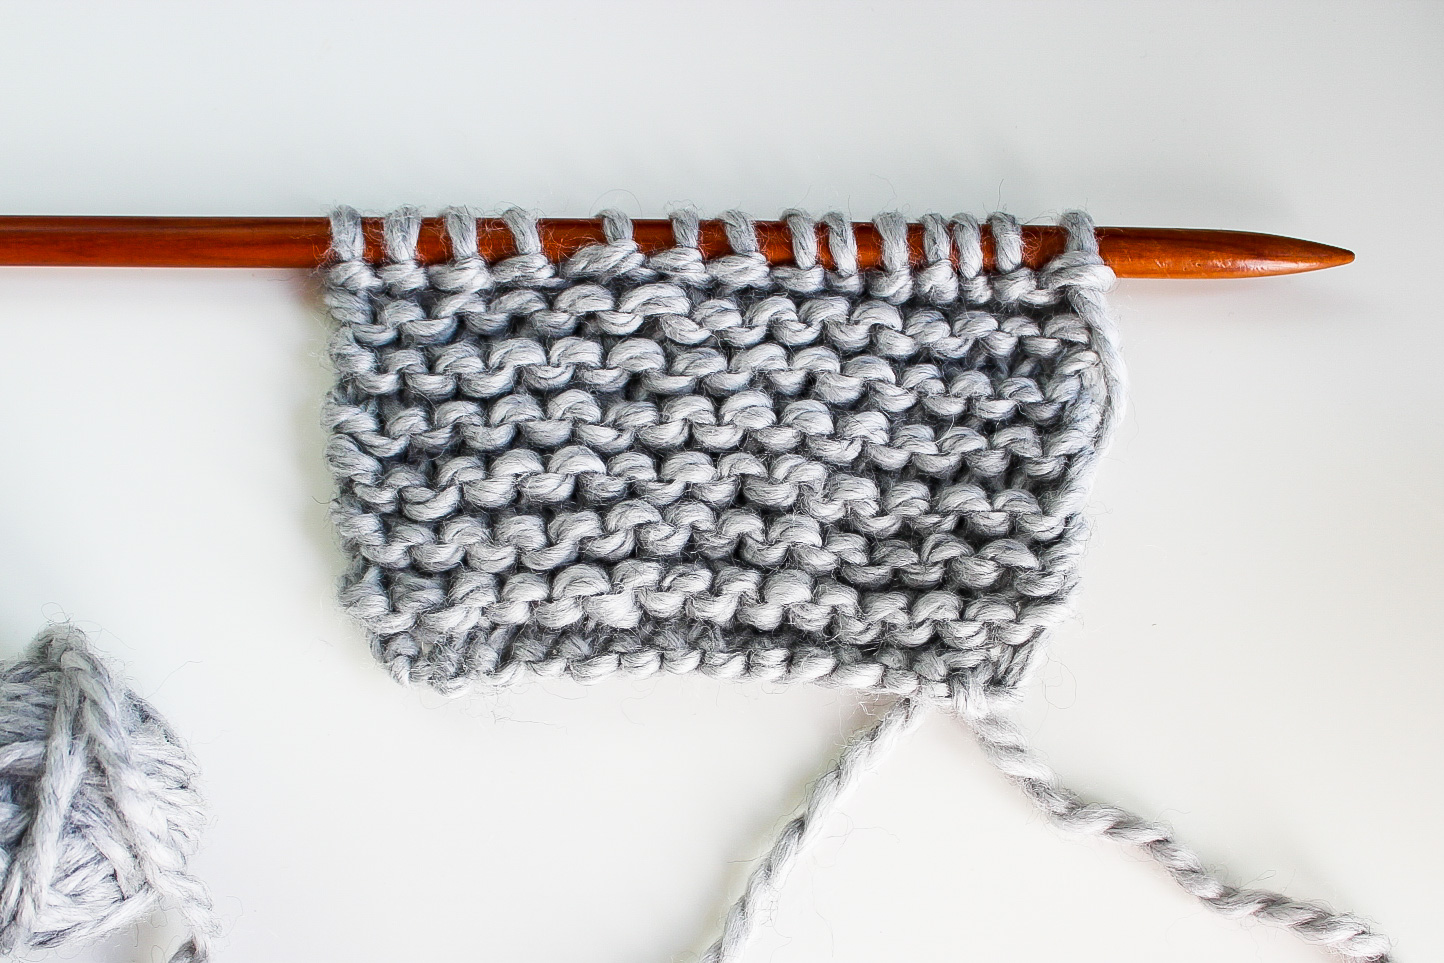
Knitting Tip 1: Knit the first two stitches of ever row tighter for even edges
When I first started knitting, one of the most frustrating things was weird uneven edges! I couldn’t for the life of me figure out how other knitters were able to get their edges so crisp and straight. It wasn’t until I learned this first hack that I was able to finally achieve those dream edges on my knitting. The secret to even edges is easy. Simply, knit the first two stitches of ever row a bit tighter than the rest of your stitches. I couldn’t believe what this simple change did for my knitting! Now I get complimented all the time on my neat straight edges and I always share this secret to everyone that craves that beautiful crisp edge.
Pictures Below: Top picture shows messy edges without this hack. Bottom picture shows neat edges using this hack.


Knitting Tip 2: It’s okay to pick up too many or too few stitches on an armhole
I used to dread and avoid any time I reached the part in a pattern that required picking up stitches for armholes. In fact, I would say this is the main cause for most of my unfinished objects. No matter how hard I tried, it seemed impossible for me to get the right stitch number as the pattern recommended. I would spend hours undoing and redoing my picked-up stitches, which frustrated me to no end. But this is no longer the case after I stumbled upon this genius hack! When picking up stitches along your armholes, don’t stress so much if you pick up too many or too few stitches. Simply increase or decrease these stitches at the underarm seam in the first few rows and voila! You don’t have to spend any more time undoing and redoing your picked-up stitches to get that perfect amount! And the best part is those increases and decreases you added will be hidden under your sleeve. So no one will ever know!
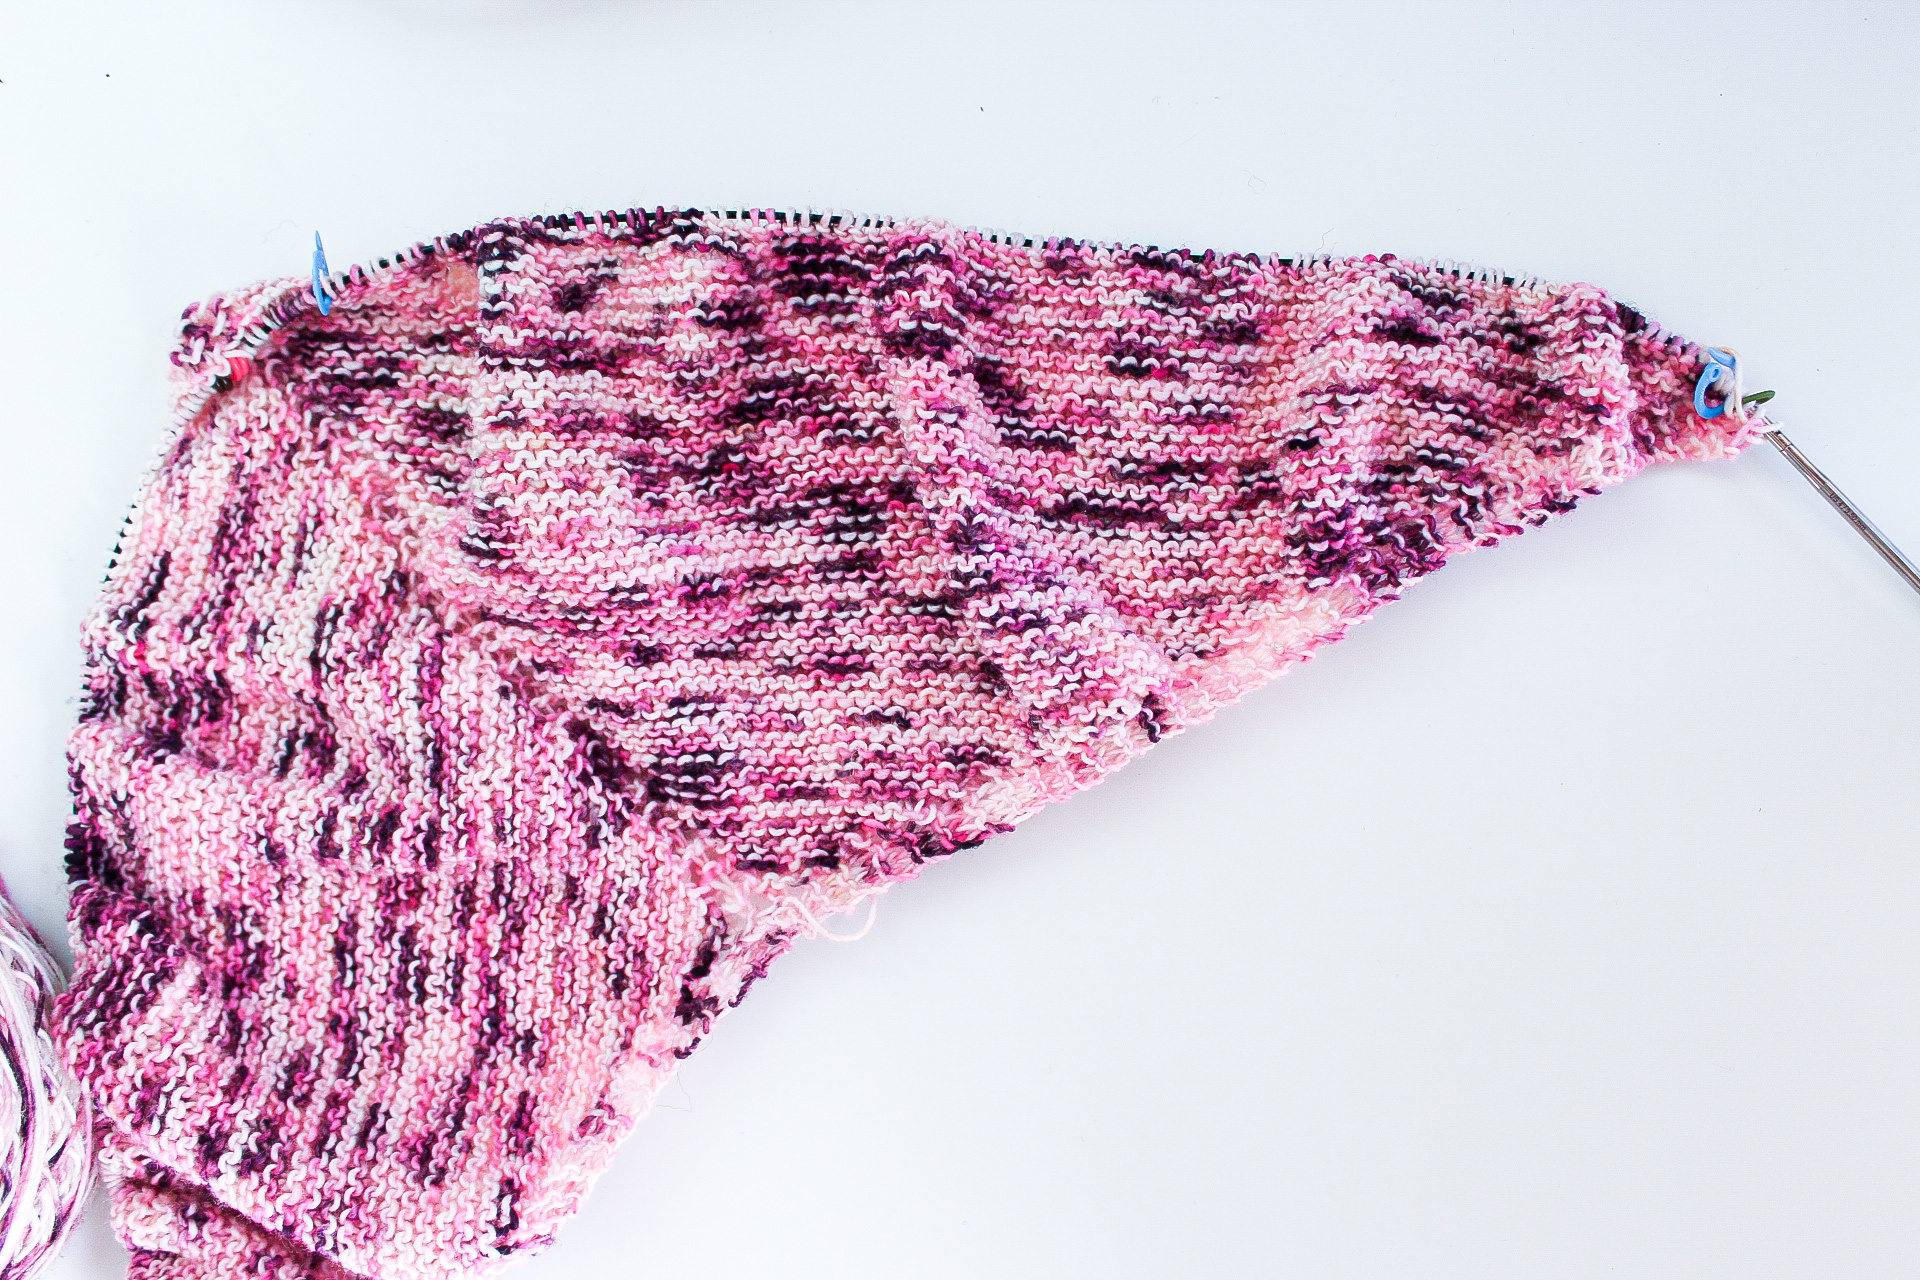
Knitting Tip 3: Use stitch markers to help check your stitch count on big shawls
The latest trend I have been seeing everywhere and loving is making shlankets! A shlanket is a shawl that is big enough to also be used as a blanket. And I am all in for this trend! Unfortunately, shlankets can come at the cost of an enormous stitch count, which can easily get difficult to manage. One hack that I use to keep the counting manageable and easy is mark off amounts of 100 with stitch markers. It’s just like the bundle counting we learned in grade school. You only need to count the group of 100 once, mark it off, and then count only what is outside the group of 100. For instance, let’s say my shawl has reached 234 stitches and I have already marked off two sections of 100. Then I only need to count the 34 stitches. Easy, right! So much less counting! Just make sure your stitch count stitch markers are different looking than your center or side border stitch markers. Also note that with triangle shawls marking off groups of 100 within each right or left triangle and not across the center stitch increases is best.
Picture Below: Blue stitch markers mark a section of 100 sts on this triangle shawl.
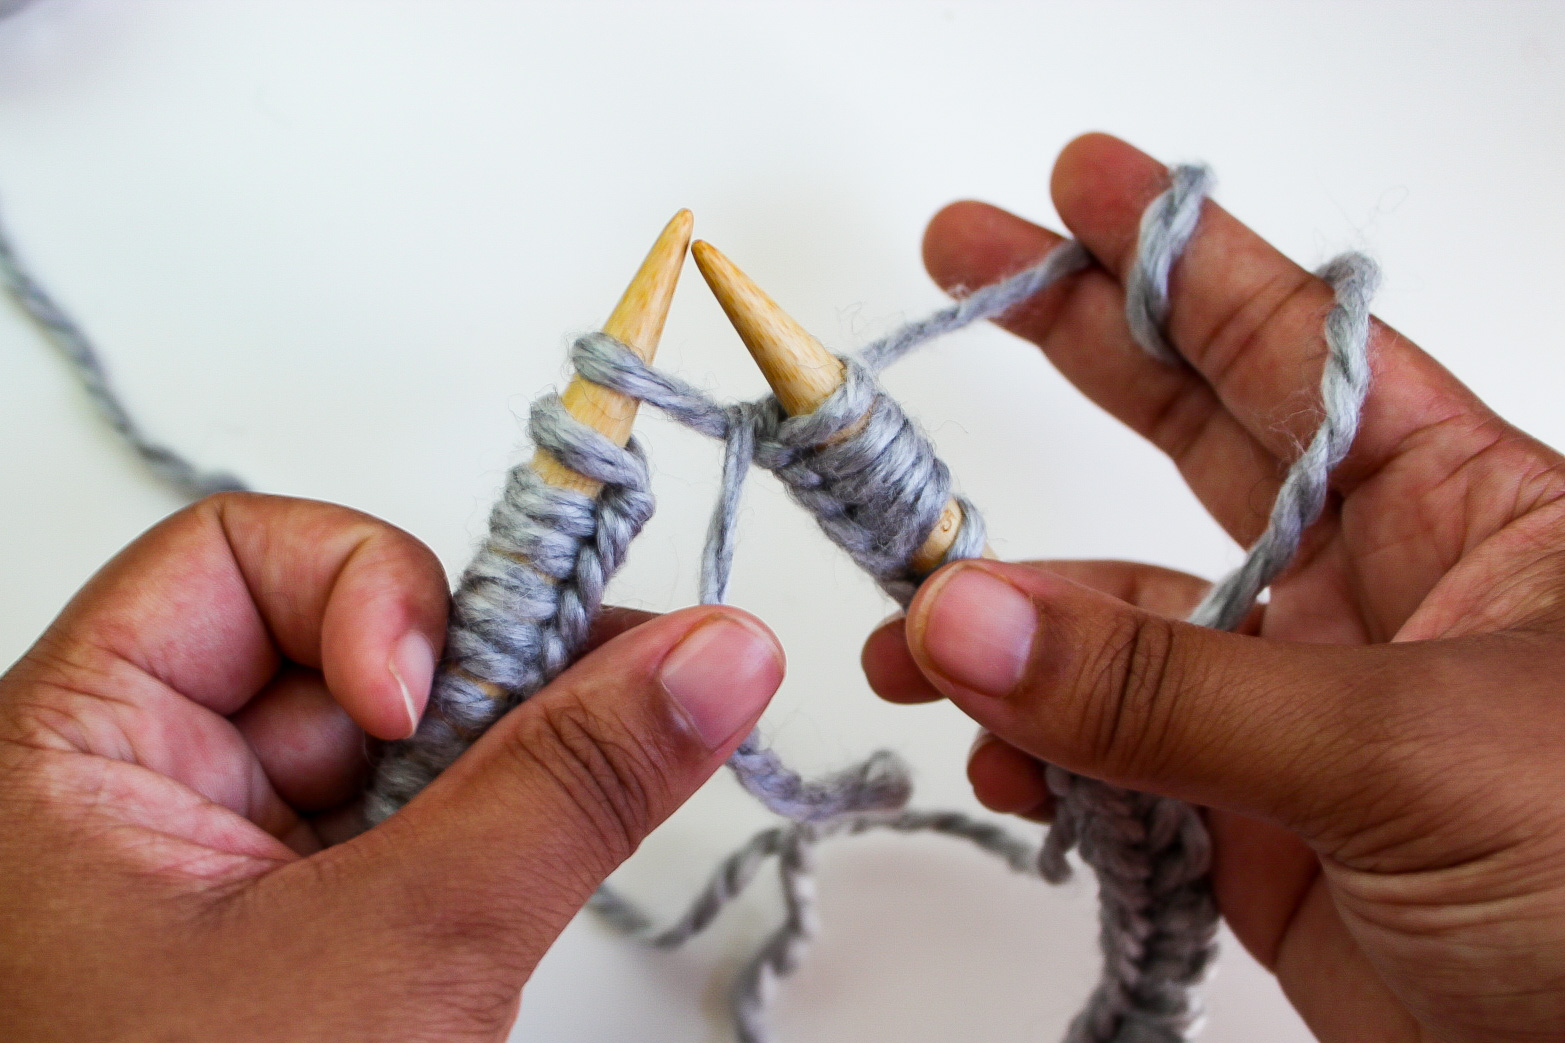
Knitting Tip 4: Cast on one extra stitch when working in the round
Once I learned to join in the round, I quickly became frustrated with the unevenness at the beginning of the first round. When weaving in ends, I always did my best to hide the annoying bump, but it never seemed good enough. Then I learned a little trick to eliminate the uneven join altogether. When casting on your stitches to join in the round, cast on one extra stitch and arrange your needles to work in the round. Then move the last cast on stitch to your left-hand needle and knit together the first two stitches on the left-hand needle. This decrease stitch will be the first stitch of your round and joins the work tightly for an even beginning of round join.
Pictures Below: Top picture shows moving last cast on stitch to left-hand needle. Bottom picture shows knitting together the first two stitches on the left-hand needle.


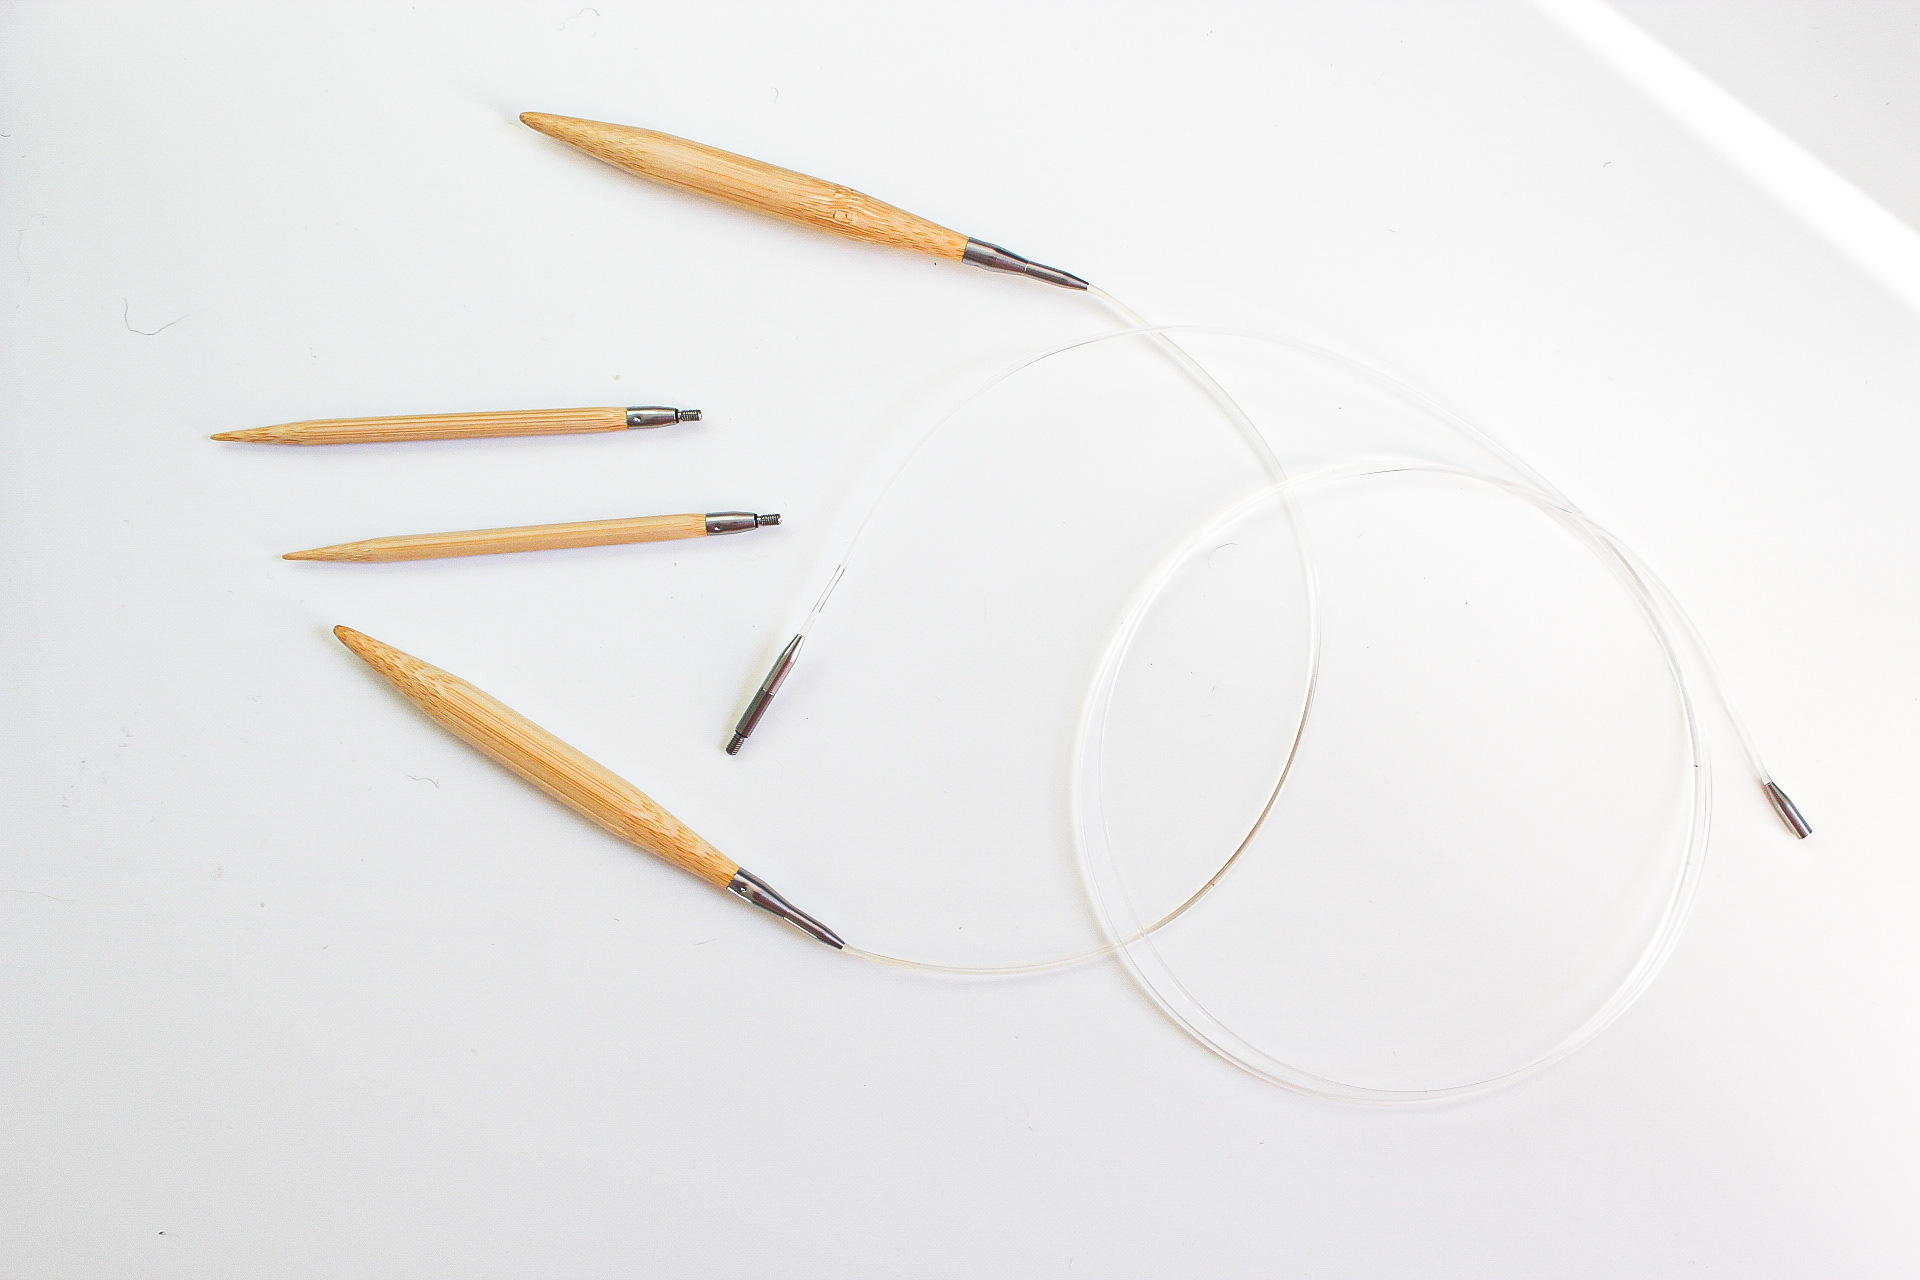
Knitting Tip 5: Invest in an interchangeable needle set
The best money saving and time saving move I ever made as a knitter was splurging on my first interchangeable needle set. An interchangeable needle set is a set of different knitting needle sizes that you can twist off and reattach to different cable wires. This lets you mix and match different needle sizes to different wire sizes to create the exact wire/needle size that you need for any project. Although interchangeable needle sets are a big investment upfront, you will make your investment back in the money and time you will save not needing to go to the craft store or your local yarn shop every time you have a new project you want to cast on.
Also don’t forget that craft store coupons and sales can bring the cost down! It also eliminates the stress of trying to make gauge for a pattern. Is your gauge too tight or too loose? Then going up or down in needle size it so easy to do with an interchangeable needle set. Another plus is that interchangeable needle sets have flexible wires like circular needles which makes them easier to store in project bags. Not always knitting in the round? No problem. You can easily knit flat or in the round on interchangeable needles. Need needles for a hat and a sweater? No worries. Just simply mix and match the needle size with the wire size you need and you can work on a range of projects from socks to hats to sweaters to blankets. If there was one tip I could share with all knitters, it would be this one!
I hope you were able to learn something new from this list of tips, tricks, and hacks! I also hope you try some of these tips and hacks for yourself and that they can eliminate some of the frustration from your experiences as a knitter.
Happy knitting, everyone!

This is a topic that’s near to my heart… Many thanks!
Exactly where are your contact details though?
Hello!
We can be reached by email at knittingcircle@program-director.net or by telephone at 1-833-622-6523.
Thank you!
great tips thanks for the help
Good tips, thank you.
These are all very useable tips. I was please to see some I was already doing. The straight edges tips is needed and welcome.
Great hints! Can you tell me whether there are left handed knitting books on the market and what the email address might be
Thanks
Great question! The ‘Ask an Expert’ section is currently for members of our online community. By becoming a member, you will have access to our expert knowledge. With your membership you will also receive discounts on products and hundreds of hours of Premium content.
If you are interested in becoming a member, please click on the offer below:
https://go.knittingcircle.com/a24582
Thanks!
Learnt and applied ,very helpful Thank you.
Thank you. These are very good tips.
Need the name of an interchangeable needle set with varied tubular length cords that don’t curl. 😊✅
I’m looking for tip I saw about 6 months ago with just a few stitches to make a cord on circular needles, can you help please!
Hello Hilary,
Thank you for contacting us.
Are you referring to knitting an I-cord? Those are most easily done with double-pointed needles, since you slide the knitting back and forth. Here is a short video on that technique:
https://www.theknittingcircle.com/video/how-to-knit-i-cord-018404/
If you have any other questions, please chat, email, or call Customer Service.
Sincerely,
Sarah
The Knitting Circle Video Membership
Very helpful for a new beginner
I would like to see free patterns
Starting sometime in November I decided to knit my gifts for many of the cousins I found through Genealogy and have become great friends with. At thaat time I wanted to make small cowls for the girls and hats for the guys. I fond that I needed to learn to knit in the round and had never done that, so asked google and they sent me to about 3 websites where I could get info on that. With that ifo I taught myself the steps and after a lot of practice I was able to make a join but not real pretty, Then after a couple of hints from your site and one other I learned your way and it has been much more successful. then I realized while knitting the first couple of stitches I also had to hold tightly on the tail , that is what keeps it all nice and tight. I have made about 40 cowls to date and 25 hats, all knitted in the round, and I marvel at how nicely they finish up. Knitting Circle has come through for me on more than one problem, Thankyou
Hello,
Thank you for your feedback. I have forwarded your comment to the proper department. We value your opinion, and it will help with the development of our online streaming community. We will continue to listen and work hard for your complete satisfaction.
Sincerely,
Sarah
The Knitting Circle Video Membership
Love you tips
Is there a way to loosen the first row of casted on stitches after completing the scarf?
Hello Bettie,
Here’s what the experts had to say about your question:
It will be difficult to loosen the stitches. If you are brave, you could use small scissors to cut out the cast on, grab the live stitches and put them on the needle and then use a loose bind off for that edge.
Please let us know if you have any further questions
Sincerely,
Sarah
The Knitting Circle Video Membership
Good info
Just to comment on tips # 2 and 3:
Picking up stitches should always be a matter of judgement. This applies to stitches picked up in sock heels, mittten thumbs or glove fingers, neckbands, or any place where you are instructed to pick up stitches. Pick up as many as seem likely to eliminate any gaps in the seam, and then decrease.
And regarding stitch markers – you can NEVER put too many marker in your knitting.!!
Use scraps of old yarn if you run out of regular markers.
Knitting!
Great!!! Will try them all. Thank you.
another hack is to slip the first stitch on every row.
Thanks! Don’t quite get knitting in the round tip, tho.
have not heard of interchangeable needles before, sound like a fabulous idea
My problem w/ inter-changeable needles is that they come apart on me while I’m in the middle of a row and I lose stitches.
I love all the tips for easier knitting. Thank you.
Great tips.
When counting knit rows, do you only count the completed rows or do you count the last row that is still on the needle and not complete yet? I’ve knit 4 rows, when I count I only get 3 completed rows, if I do not count the stitches on the needle as a row. Stitches on the needle is the 4th row of pattern. Thank you for your help.
Hi Karen!
If you worked the row, and finished it, it counts as a row.
We have a couple of free videos that will help you:
https://www.theknittingcircle.com/video/counting-rows-in-stockinette-stitch-018530/
https://www.theknittingcircle.com/video/counting-rows-in-garter-stitch-018529/
Have a nice day!
Just Love Love this site!!! Thank You
I think this will be fun, thanks
these are good tips. I’ve been a knitter for many yrs….and always have trouble joining knitted edges together…eg..knitting a throw in rows and having to join them.
I don’t knit real often but when I do I want it right the first time. Knitting for me is mostly a winter thing because I’m an avid gardener in the warmer months and into freeze drying in the fall.
Thank you!!! Very helpful!!
Enjoyed reading your tips and will definitely try them
I know you cant comment on every scenario but …. Ive just started working on blanket for my granddaughter who is heading off to college in the fall. I’m using a simple checker stitch- 8stitches wide by 8 rows. I’m about 4 inches in and i can see that its going to be shorter than i expected. Are the purl rows making it “shrink“ or will the knit rows eventually win out???
Hello Namcy,
Here’s what the experts had to say about your question:
With everyone’s gauge being different, it is possible that the purl rows are affecting how it looks. We have a couple of videos on checkerboard patterns that might help you!
https://www.theknittingcircle.com/video/reversible-checkerboard-pattern-018560/
https://www.theknittingcircle.com/video/garter-checkerboard-pattern-018556/
Sincerely,
Danesha
The Knitting Circle Video Membership
When the project is complete, block it and the work will spread out because the places where the knit and purl sections join are uneven as you knit and cause the work to seem shorter.
Thanks so much for the knitting in the round about casting on an extra stitch. I am about to start a cable knit tour on round needles .I’m definitely doing this. Thanks again
interested in learning more knitting tricks
Nice instructions 👍
Why do In get such a big knot at my slip knot when starting my project I feel it does not look professional ? Any help would be appreciated.
Hi Elaine. For me it’s making sure that I tighten down the knot enough to have it look neat and tidy. Here’s a video on how to make a slip knot that you might find helpful: https://www.theknittingcircle.com/video/how-to-make-a-slip-knot-018438/
Jen
The Knitting Circle
Great hints. Have been knitting over 60 yrs . The joining of round has always been a prob. I discovered your method by tria and error (many) yrs ago. Am anxious to try #1 on next project. Thank you
Solved a couple of issues I’ve been struggling with for a long time…thank you. Also, one of the best gift I ever received is my interchangeable needle set…I use them for everything!
I need help with reading my vest pattern
very wonderful help. Thanks
Love these hacks, I came up with a trick similar to the stitch markers to count with a one piece dolman sleeve dress I made for myself a while back (over 1000 stitches) and a few years ago, I discovered the interchangeable needles… I was curious and splurged in one set… I have not used straight needles again!
How do I increase at the beginning of the row that doesn’t look so loose
Hello Beverly,
Thank you for contacting us.
Hello ,
Thank you for contacting us. Great question! The ‘Ask an Expert’ section is currently for members of our online community. By becoming a member, you will have access to our expert’s knowledge in Knitting. With your membership you will also receive discounts on products and hours of Premium video content.
If you are interested in becoming a member, please click on the special offer below: https://go.knittingcircle.com/C27024
If you have any additional questions, please email or contact Customer Service at 1-833-622-6523.
Sincerely,
Lindsay
The Knitting Circle Video Membership
Good tips. Thanks.
LOVE tip 4! Have started knitting lots of socks and always been unhappy with the join – can’t wait to start the next one now!
Enjoy knitting
super tips! easy, practical,
and they do make a difference
I cannot keep the interchangeable needle with the wire, it keeps on getting unscrewed.
Tips are very helpful 😊
Helpful. Thanks
I have also seen this done by not adding the extra stitch but slipping the last one over the first one, but not off the needle. Or doing that with an extra stitch so you are kind of hooking the needles together. It still turned out loose and the one you show in the picture also looks like it will be loose, you have to be really careful with the slack. So far for me it hasn’t come out all that great but definitely better than not doing it.
I love my set of interchangeable needles! And the tip is right on. But I wish the sets would come with smaller tips than US4 and have more flexible cords. I have a fairly loose tension and often need to go down a size or two. And magic loop is my go to method for small circular pieces. (Never been able to manage DPNs. Just a couple things to consider when investing in a set. Thanks for the great tips!
The needle company HiyaHiya offers size 2, 2.5 and 3 US needles but buy the cables in order to attach the needles.
Useful hints
I really appreciate all of the wonderful knitting tips you display. Many are very new to me and I am eager to try them. Thank you
Loved them all. Even a long time knitter likes to learn and sometimes refresh what they know. Keep it up and thank you.
Those tips will come in handy. Thanks
Happy you are here
Thanks for sharing the tips…#4 is then one I use when knitting in the round. A friend taught me that one.
I just got the needles. Can’t wait to try them
Your hints and illustrations are so helpful. I love reading them and have used several of thrm.
Your hints and illustrations are so helpful. I have used several of them.😊
WHAT HAPPENED TO TIP #4??
Hello Mary,
Thank you for contacting us.
Oops. We are missing a header there. Tip 4 begins where it says “Once I learned to join in the round, I quickly became frustrated with the unevenness at the beginning of the first round. When weaving in ends, I always did my best to hide the annoying bump, but it never seemed good enough. Then I learned a little trick to eliminate the uneven join altogether.” We will get that fixed. Thanks for pointing that out!
If you have any additional questions, please email or contact Customer Service at 1-833-622-6523.
Sincerely,
Lindsay
The Knitting Circle Video Membership
Love your hints
BMTS
Like to knit !
Great tips for this old knitter. My biggest interchangeable needle issue is uneven joins t the wires. I’ve had two different sets and both do this, plus coe loose. Any suggestions? Are there kinds that don’t do this?
Hi Susan. There are many different types of interchangeable needles and knitters like them all for different reasons. I’m personally a fan of the Knitter’s Pride interchangeables. I find the join to be nice and they never come loose on me!
Jen
The Knitting Circle
Enjoyed reading your tips and will definitely try them
I appreciate the tip in regard to adding one stitch when casting on. Many thanks. Also, I have a problem of of my interchangeable needles constantly loosening at the join. I have to check every row to keep them tight. It’s a good set, so am surprised this keeps happening. Any tips for that?
Use the “pin” supplied with every set or cable. Insert in tiny hole where cable fits Easy to do, pin fits every needle, if you really tighten it I challenge you to be able to detach the needle without the pin.
Not all needles fit the all cables, but you can buy a middle piece to rectify this ( they also come with the tightening pins)
My sister in law had the same problem. There is a small wire “key”, a little bigger than a paper clip, included in the sets. Insert into the hole of the connector to give you something to grab onto. Tighten the needle by twisting at the base.