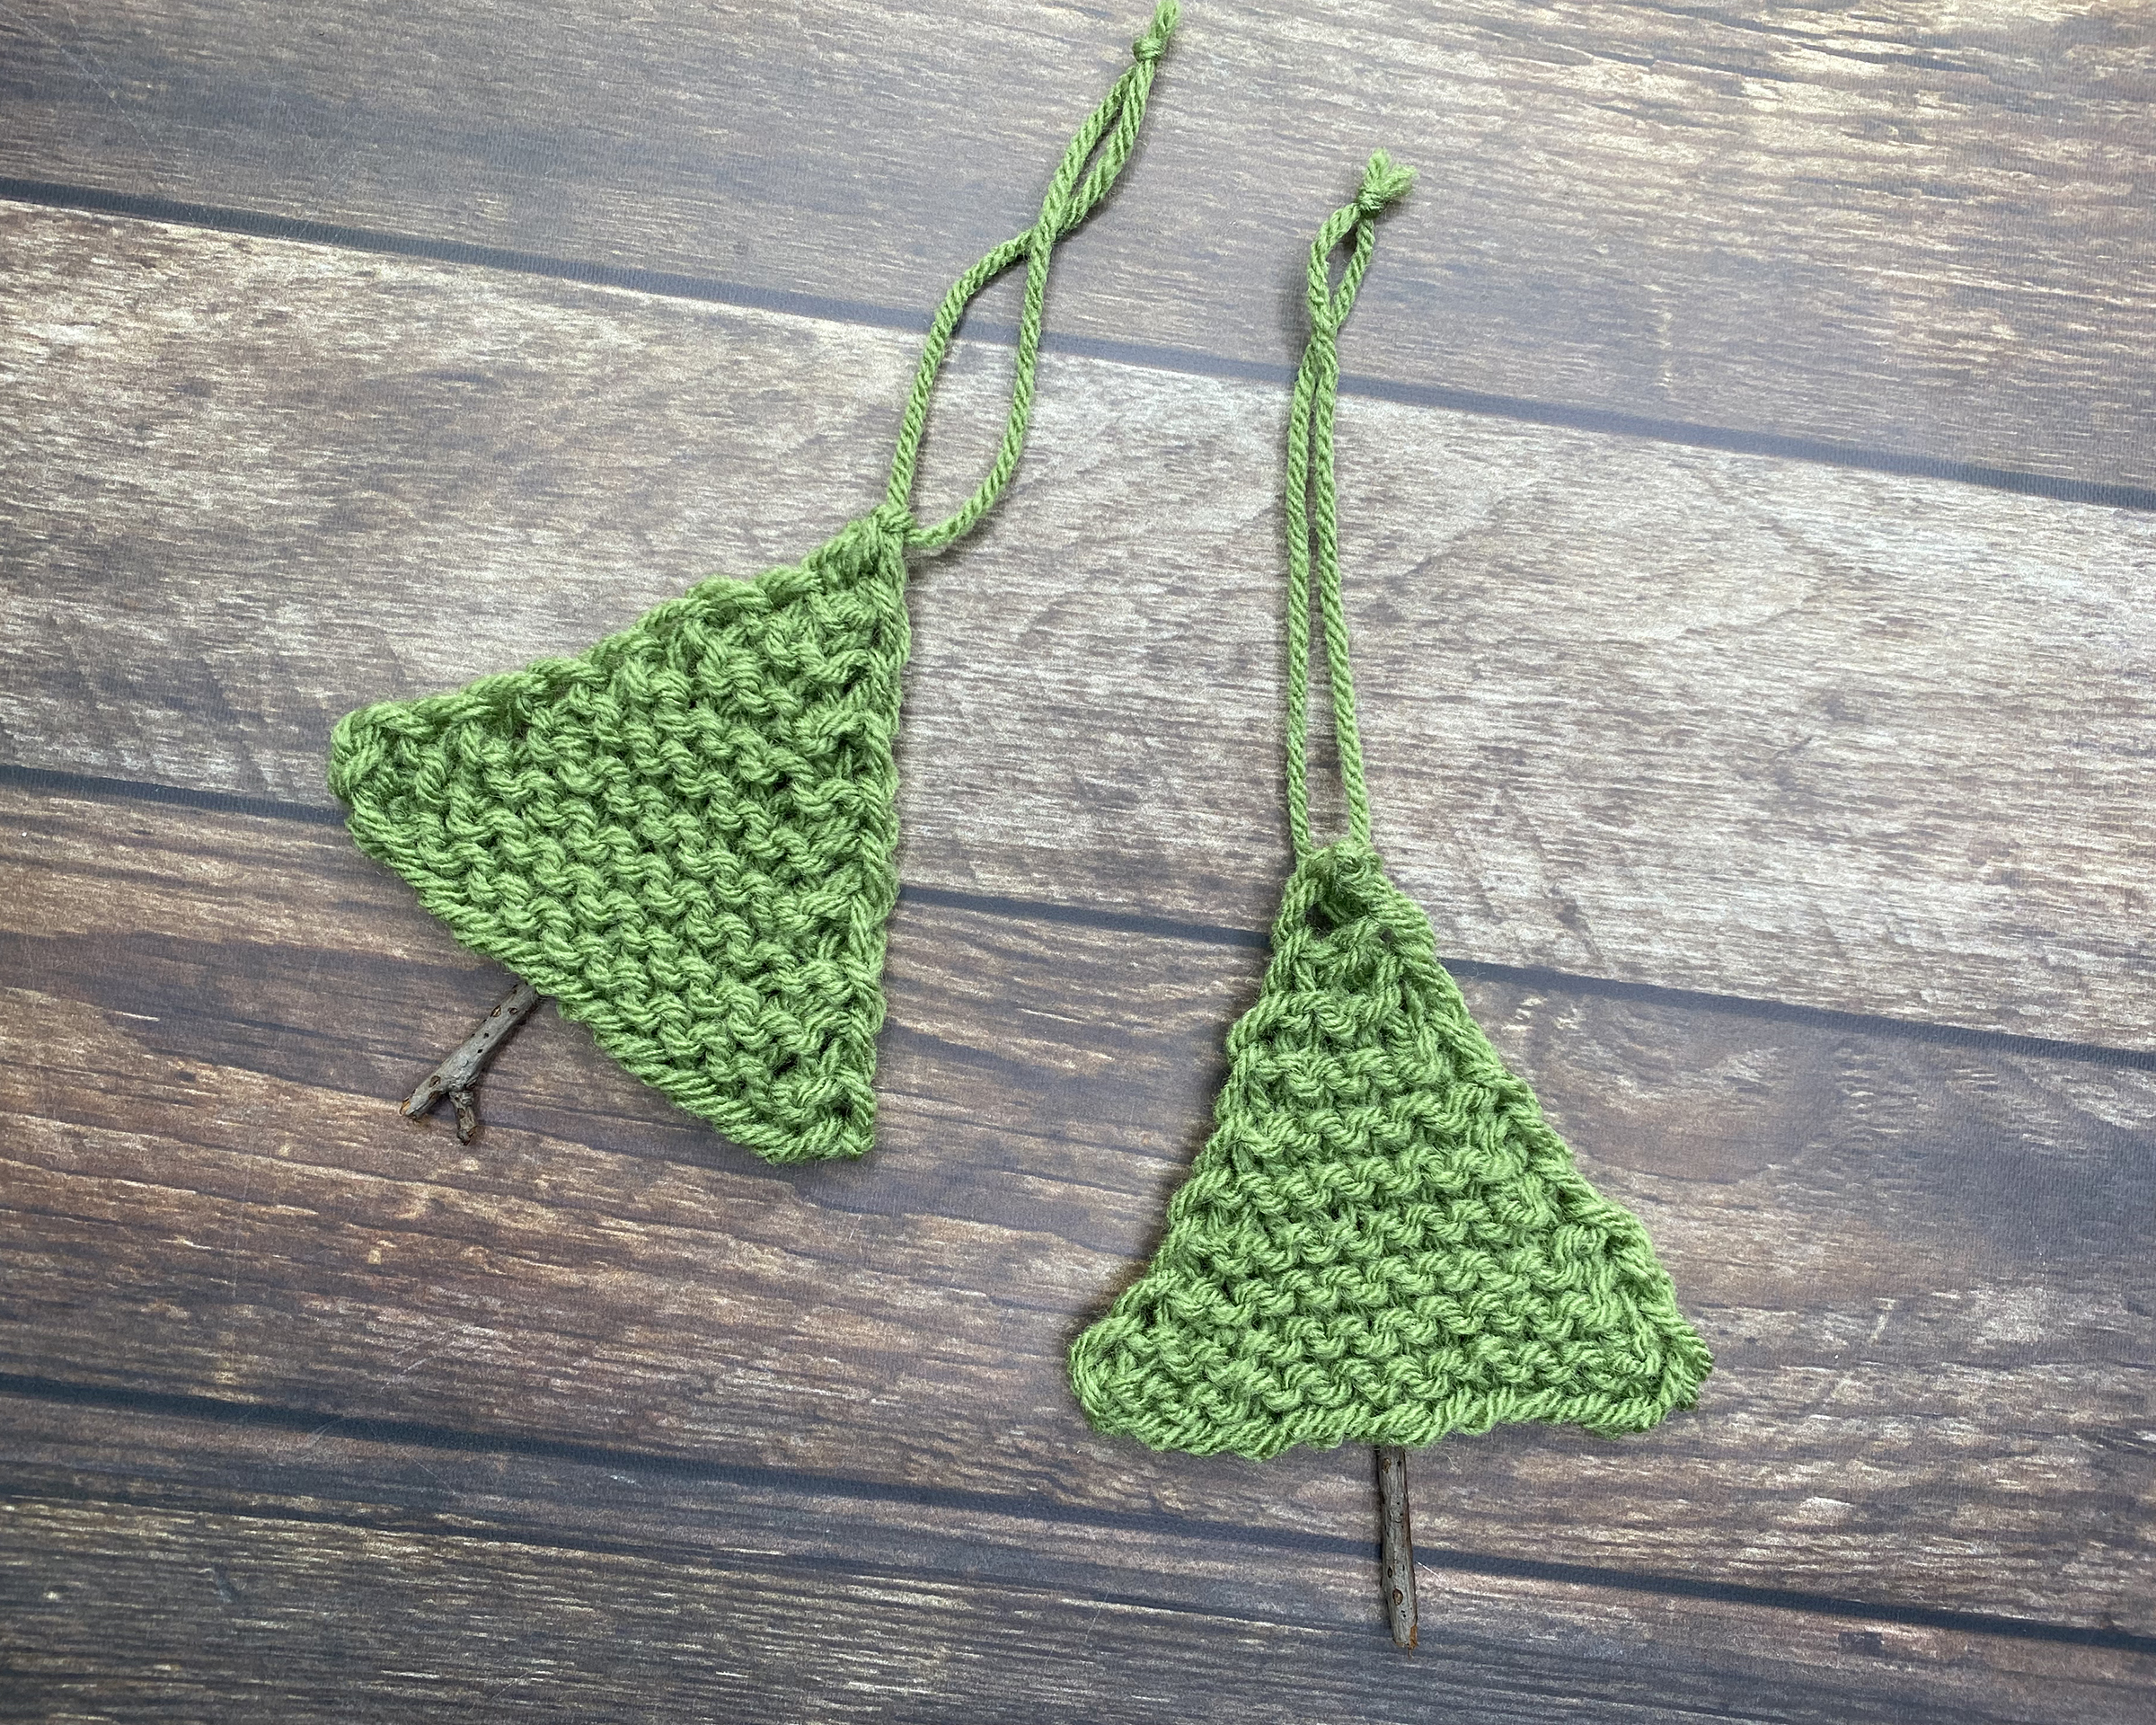
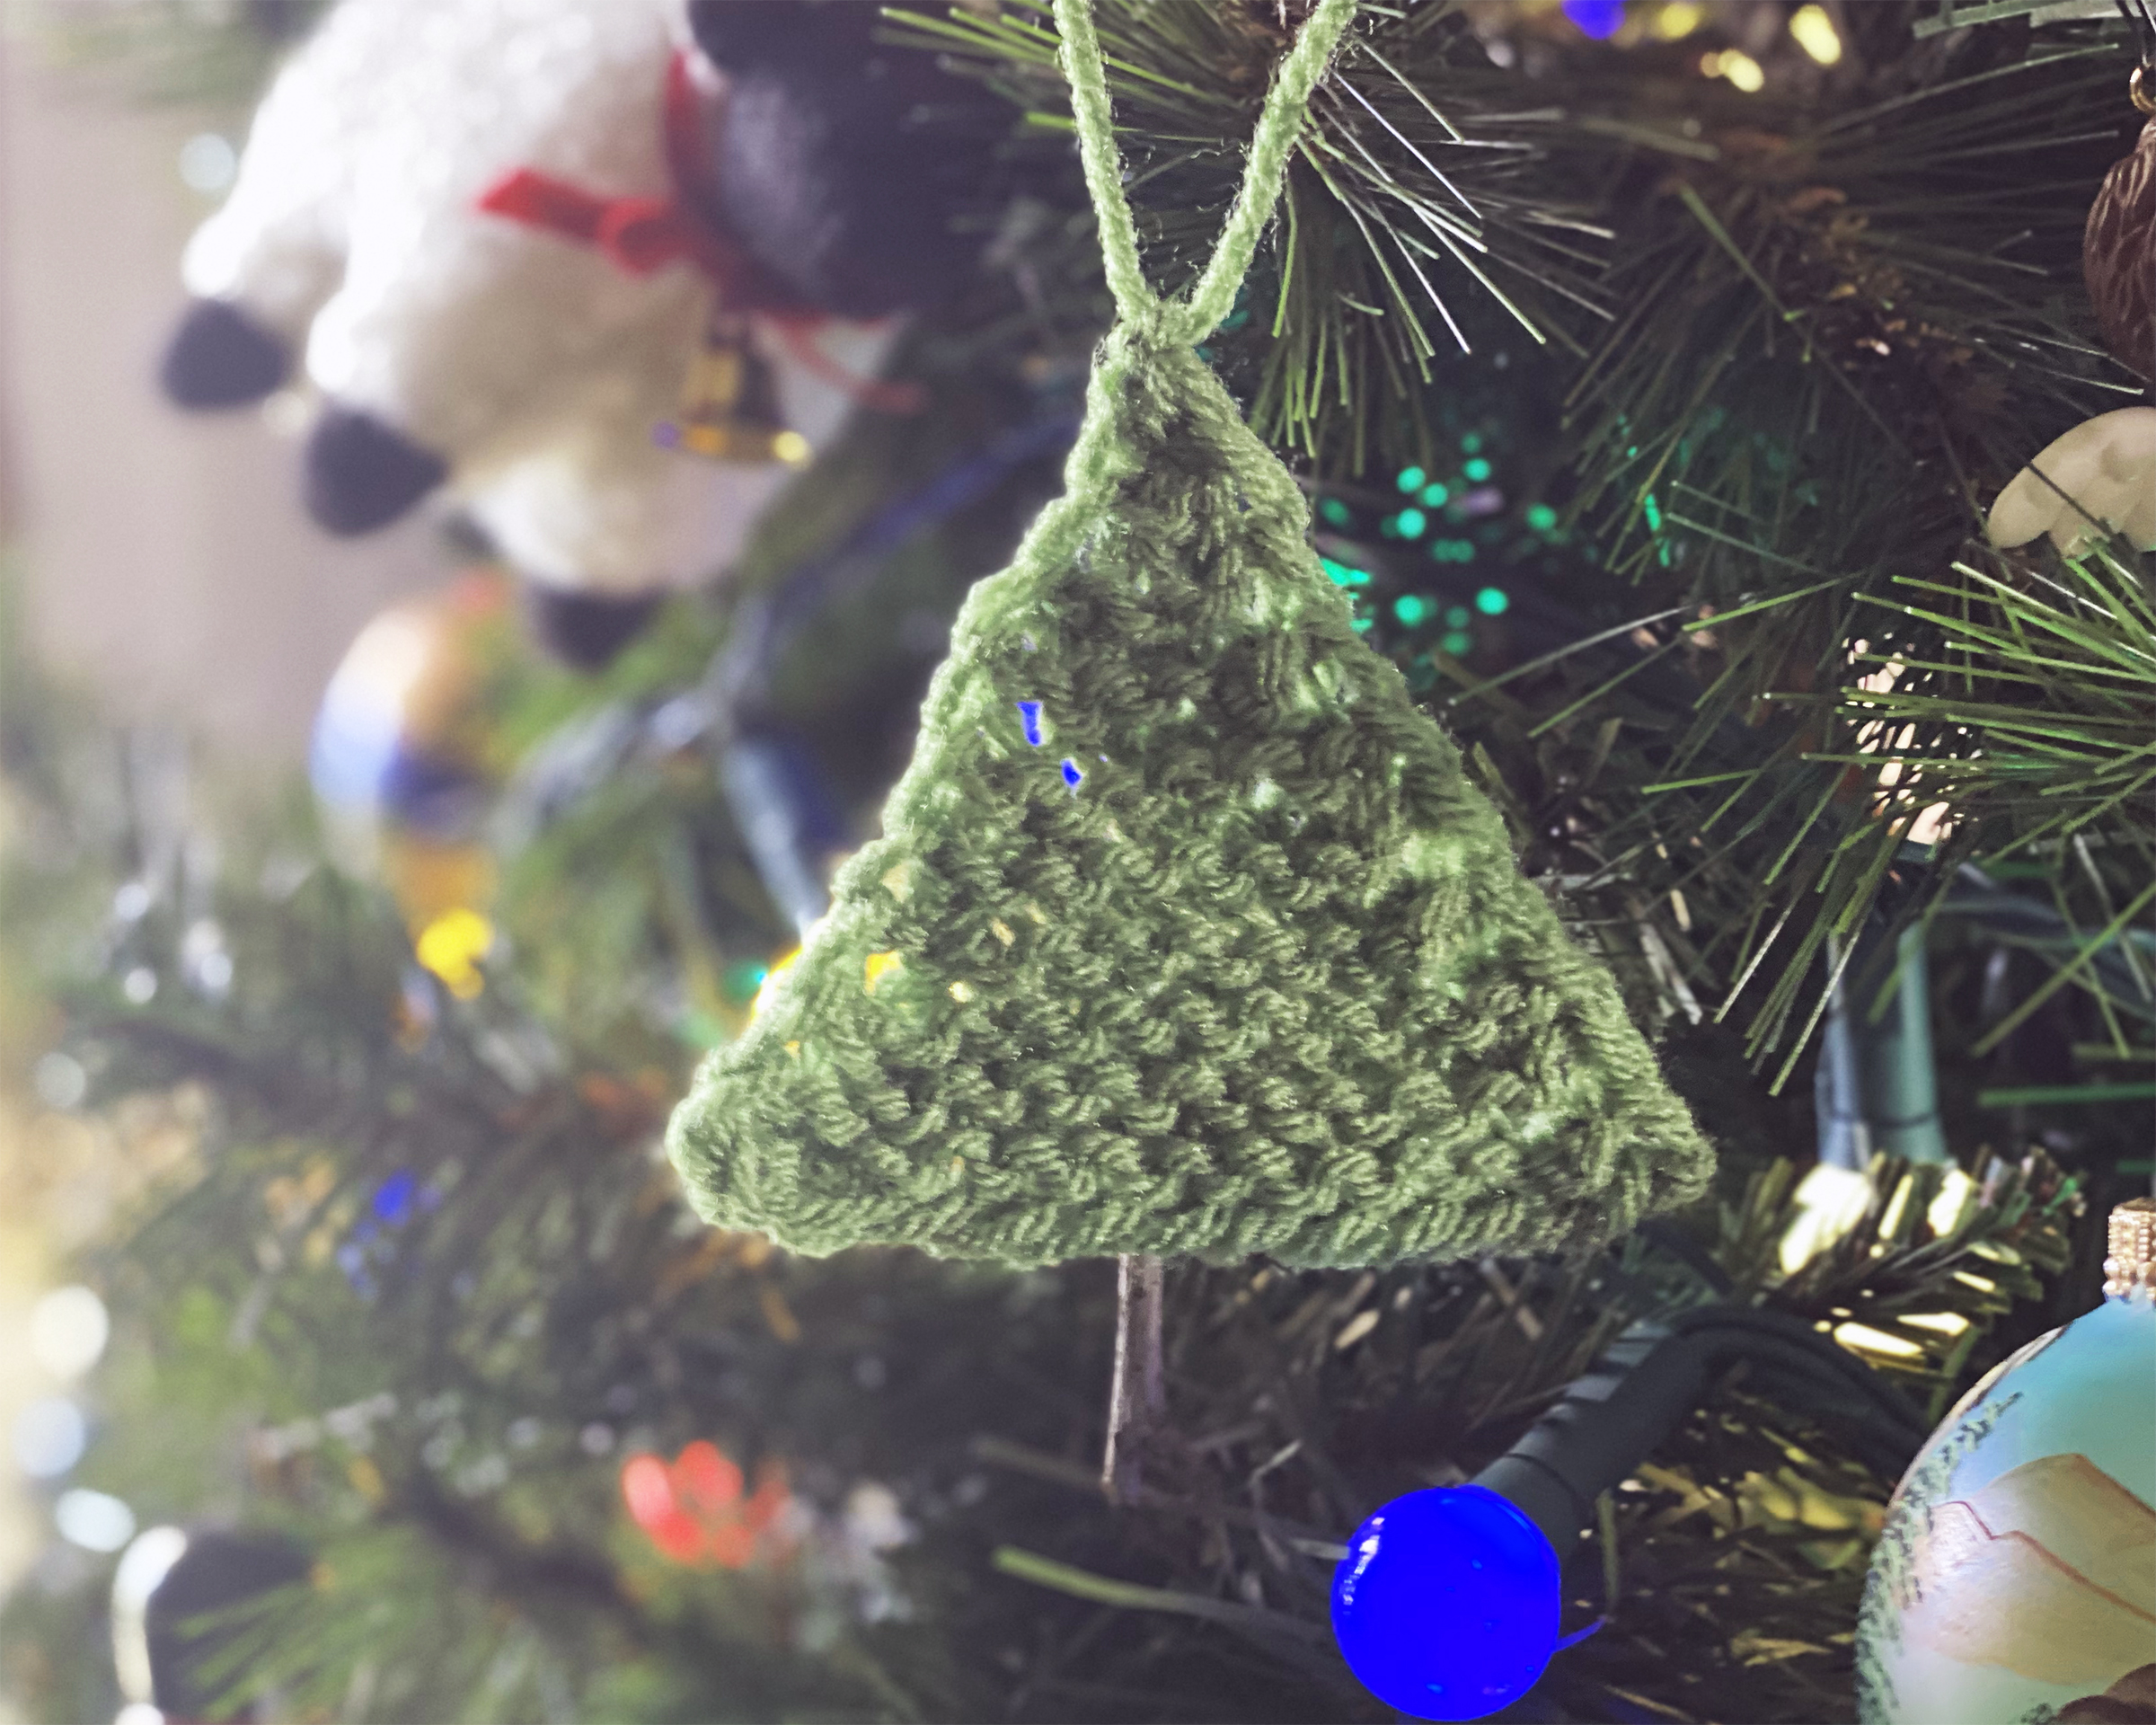
When it comes time to decorate my home for the holidays, I like to add a little handmade touch to my décor whenever I can. Over the years, I’ve knit, crocheted, and cross-stitched ornaments and other festive knick-knacks for my home. Here’s one more for me to add to my collection – a beginner-friendly tree ornament!
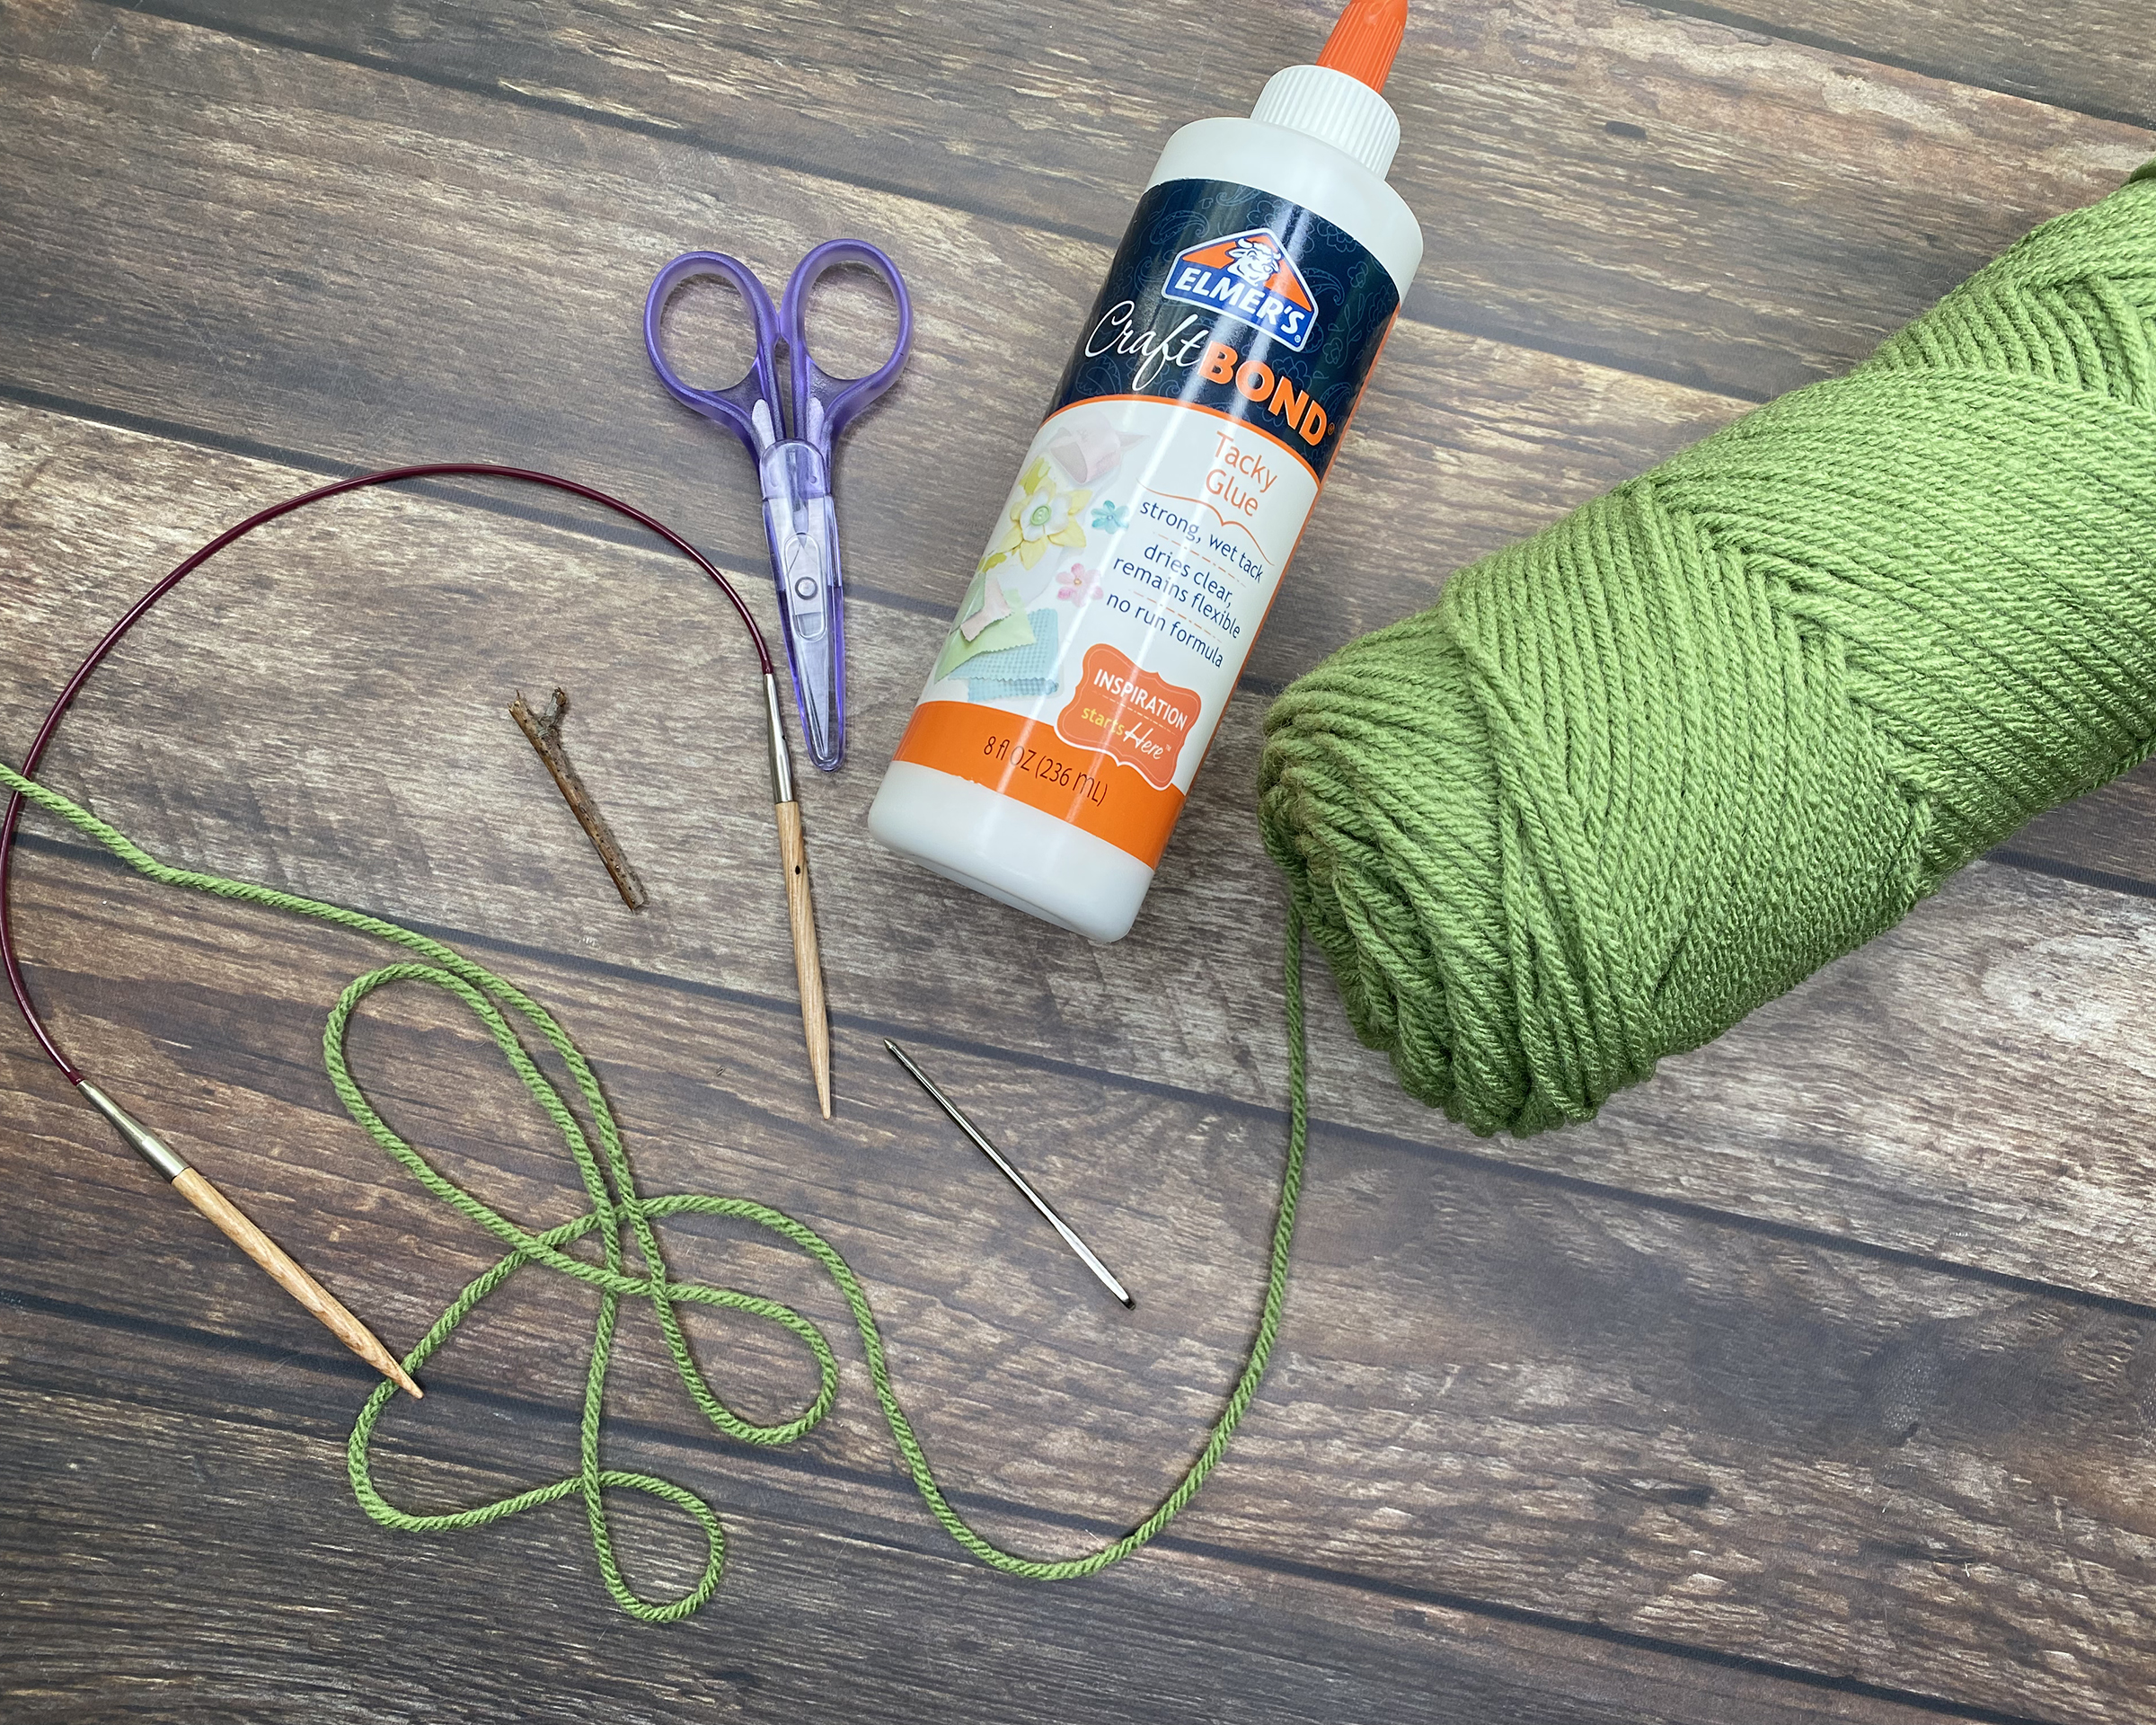
SUPPLIES
- 10 yards of worsted weight yarn
- US Size 7 [4.5 mm] knitting needles
- Tapestry needle
- Scissors
- Small twig, 1.5 – 2” in length
- Craft Glue
ABBREVIAIONS
- CO: cast on
- k: knit
- k2tog: knit two stitches together
- RS: Right Side
- sl: slip stitch purlwise
- sk2p: slip 1 stitch purlwise, knit two together, pass the slipped stitch over
- ssk: slip a stitch as if to knit to right needle, slip a second stitch as if to knit to right needle, slip both stitches back to left needle and knit together through the back loops
- st(s): stitch(es)
- WS: Wrong Side
- wyif: with yarn in front
INSTRUCTIONS
Using the Long Tail Cast On, CO 15 sts.
- Row 1 (WS): Sl1 wyif, knit to end.
- Row 2 (RS): Sl1 wyif, ssk, k9, k2tog, k1 – 13 sts.
- Row 3: Sl1 wyif, knit to end.
- Row 4: Sl1 wyif, knit to end.
- Row 5: Sl1 wyif, ssk, k7, k2tog, k1 – 11 sts.
- Row 6: Sl1 wyif, knit to end.
- Row 7: Sl1 wyif, knit to end.
- Row 8: Sl1 wyif, ssk, k5, k2tog, k1 – 9 sts.
- Row 9: Sl1 wyif, knit to end.
- Row 10: Sl1 wyif, knit to end.
- Row 11: Sl1 wyif, ssk, k3, k2tog, k1 – 7 sts.
- Row 12: Sl1 wyif, knit to end.
- Row 13: Sl1 wyif, knit to end.
- Row 14: Sl1 wyif, ssk, k1, k2tog, k1 – 5 sts.
- Row 15: Sl1 wyif, knit to end.
- Row 16: Sl1 wyif, knit to end.
- Row 17: Sl1 wyif, sk2p, k1 – 3 sts.
- Row 18: Sl1 wyif, knit to end.
- Row 19: Sk2p – 1 st remains. Cut yarn and pull tail through final loop to secure.
Using tapestry needle, weave in ends.
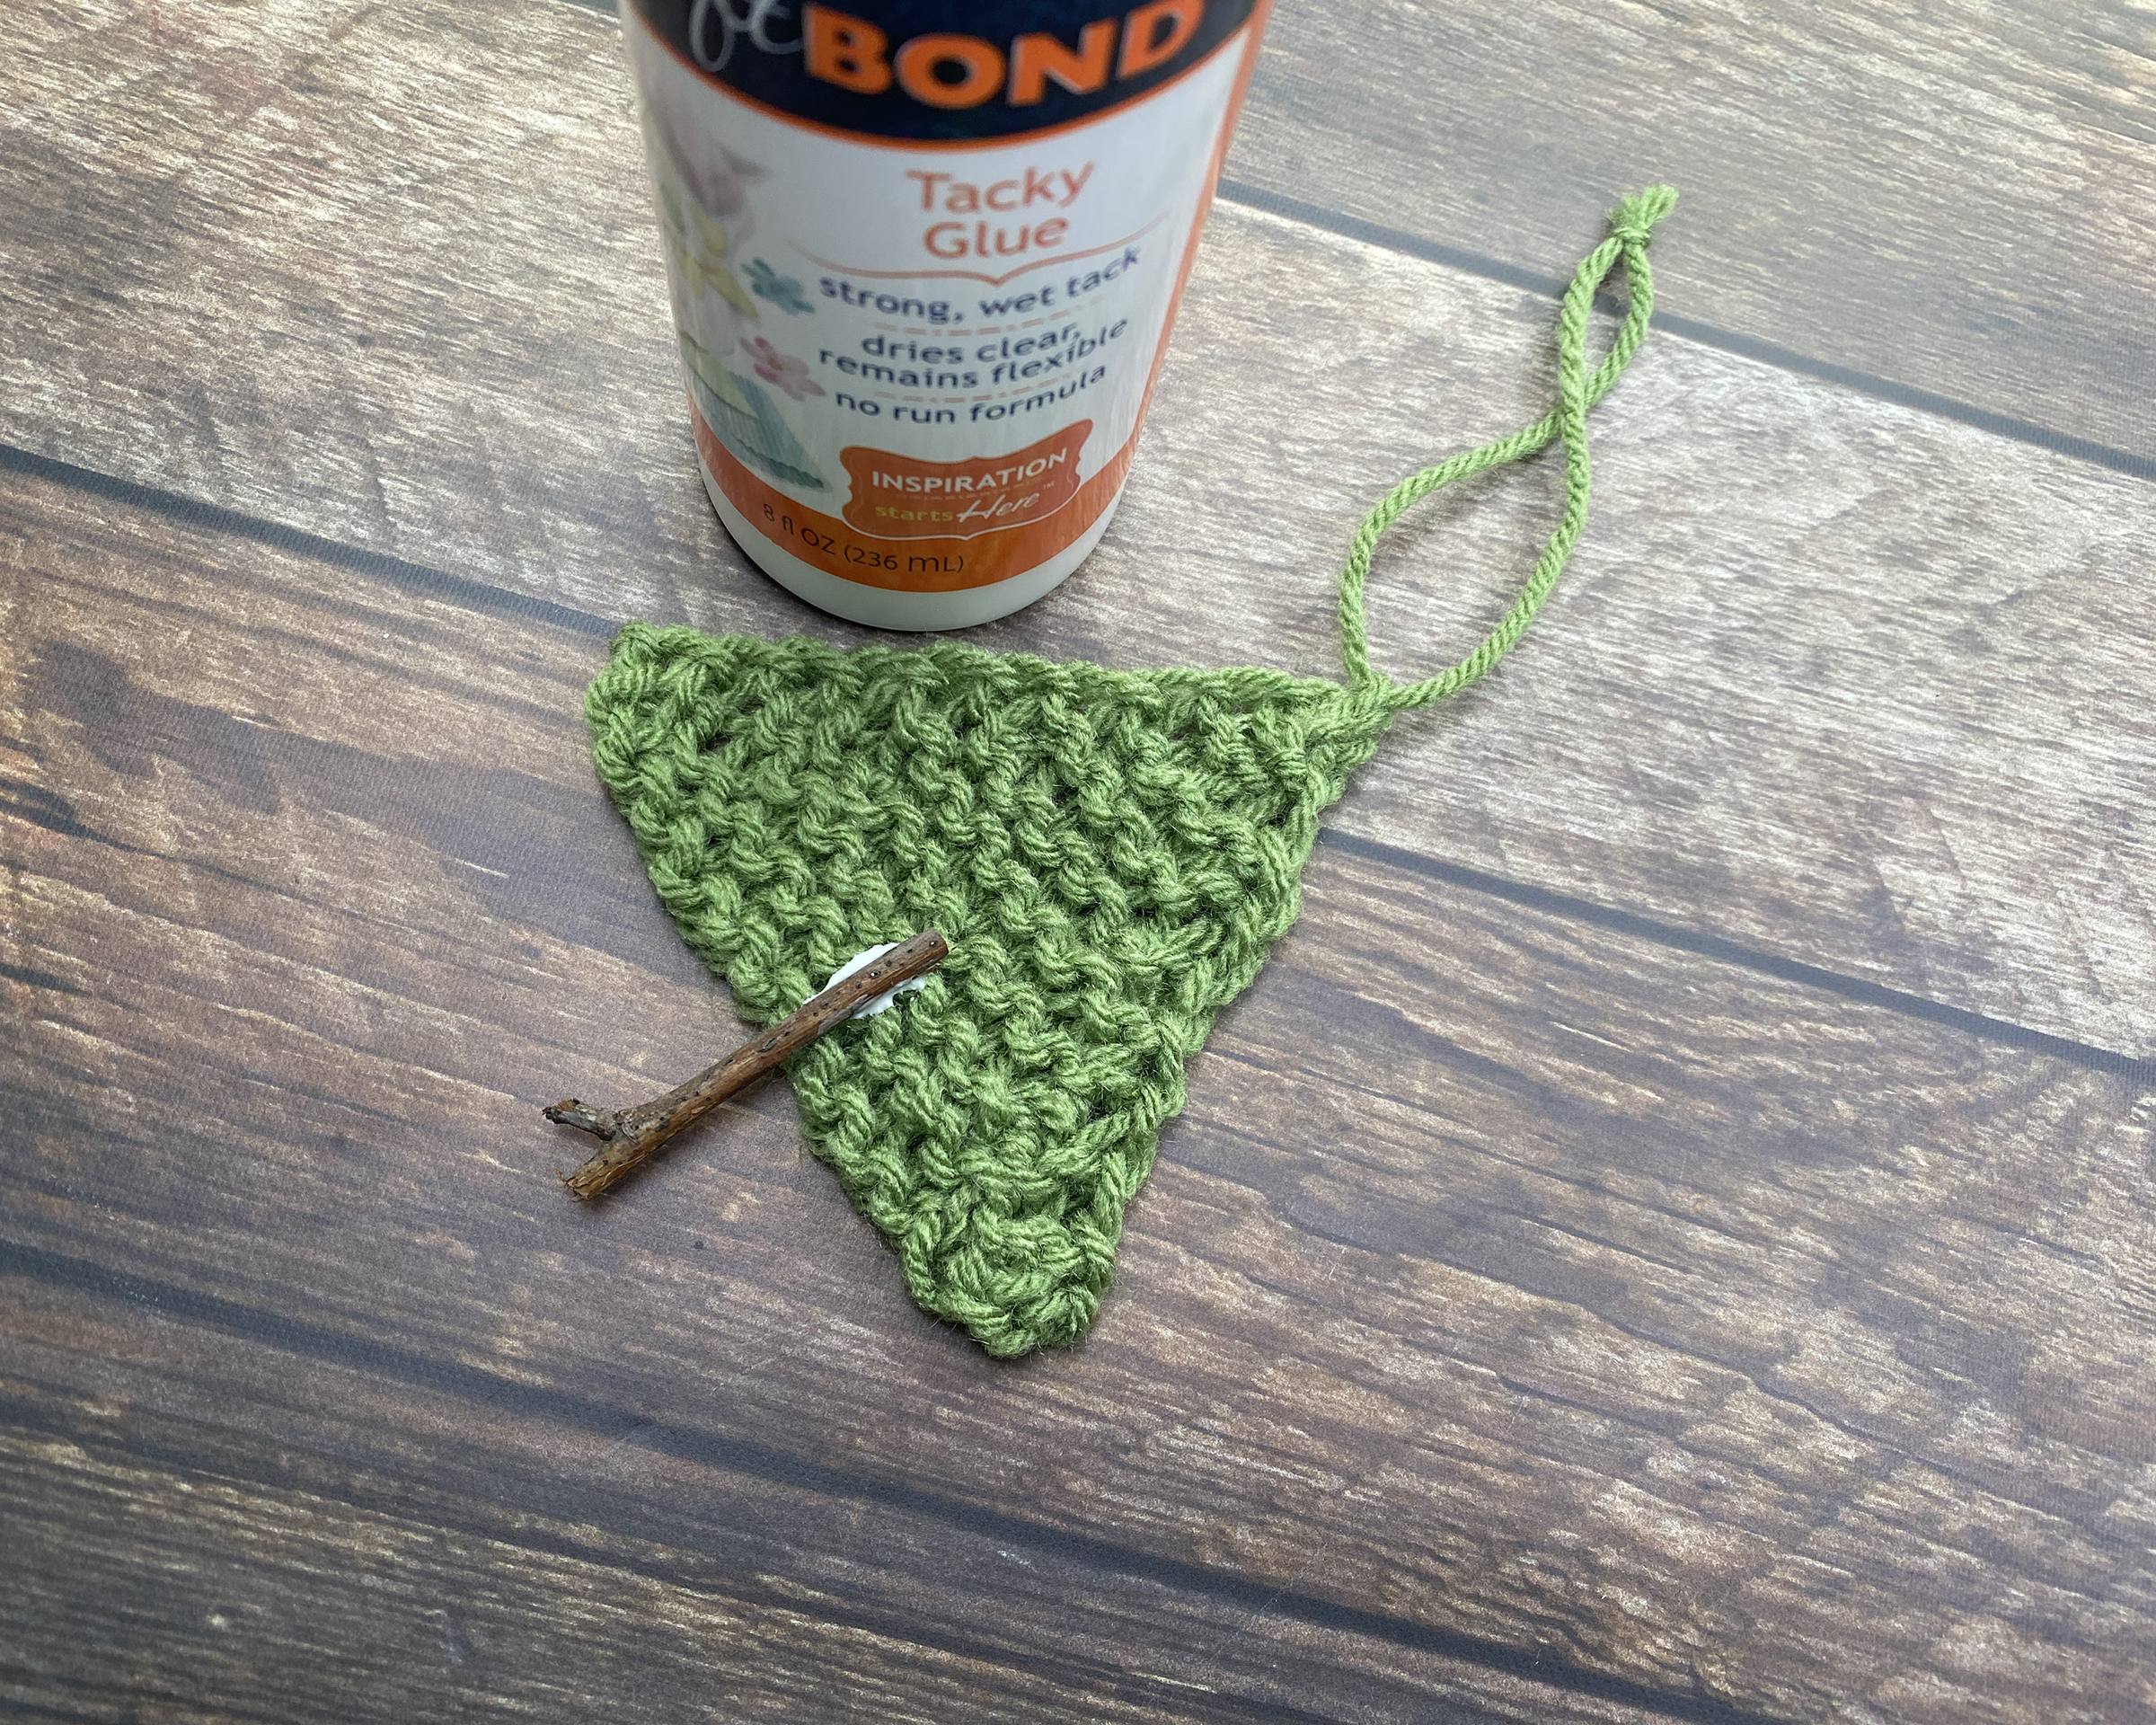
With small length of yarn, tie a loop at the top for hanging your ornament – you can also use ribbon if you like.
On Wrong Side of the fabric, use a small amount of craft glue to attach twig to the bottom center of the tree. Allow to dry.
If desired, you can embellish your tree any way you like. You can sew on sequins, beads, or other small charms. You could even try knitting one and adding beads as you go!
Looking for more ornament fun? Check out our free Mini Mitten pattern.
Are you working on any crafts for the holidays? Let us know in the comments!

First time for me learning to Crochet. I’d love to try it.
Simple…sweet! I think I’ll just whip stich the twig on, so it will look presentable from both sides…. ;)
It’s a lovely way to decorate your home and tree.
Very cute! I’d be interested in making more ornaments too! Do you have other patterns beyond the trees and mittens??
Hello Cathy,
Thank you for contacting us.
You can find some additional patterns here: https://www.theknittingcircle.com/?s=ornament
If you have any other questions, please chat, email, or call Customer Service.
Sincerely,
Sarah
The Knitting Circle Video Membership
Adorable. Thank you so much!
Wonderful, clear pattern. Will encourage experienced and new knitters! Great as a gift tag mounted on card stock with a stitch so you may write on other side! Best wishes.