Diamond Rib Stitch Patterns
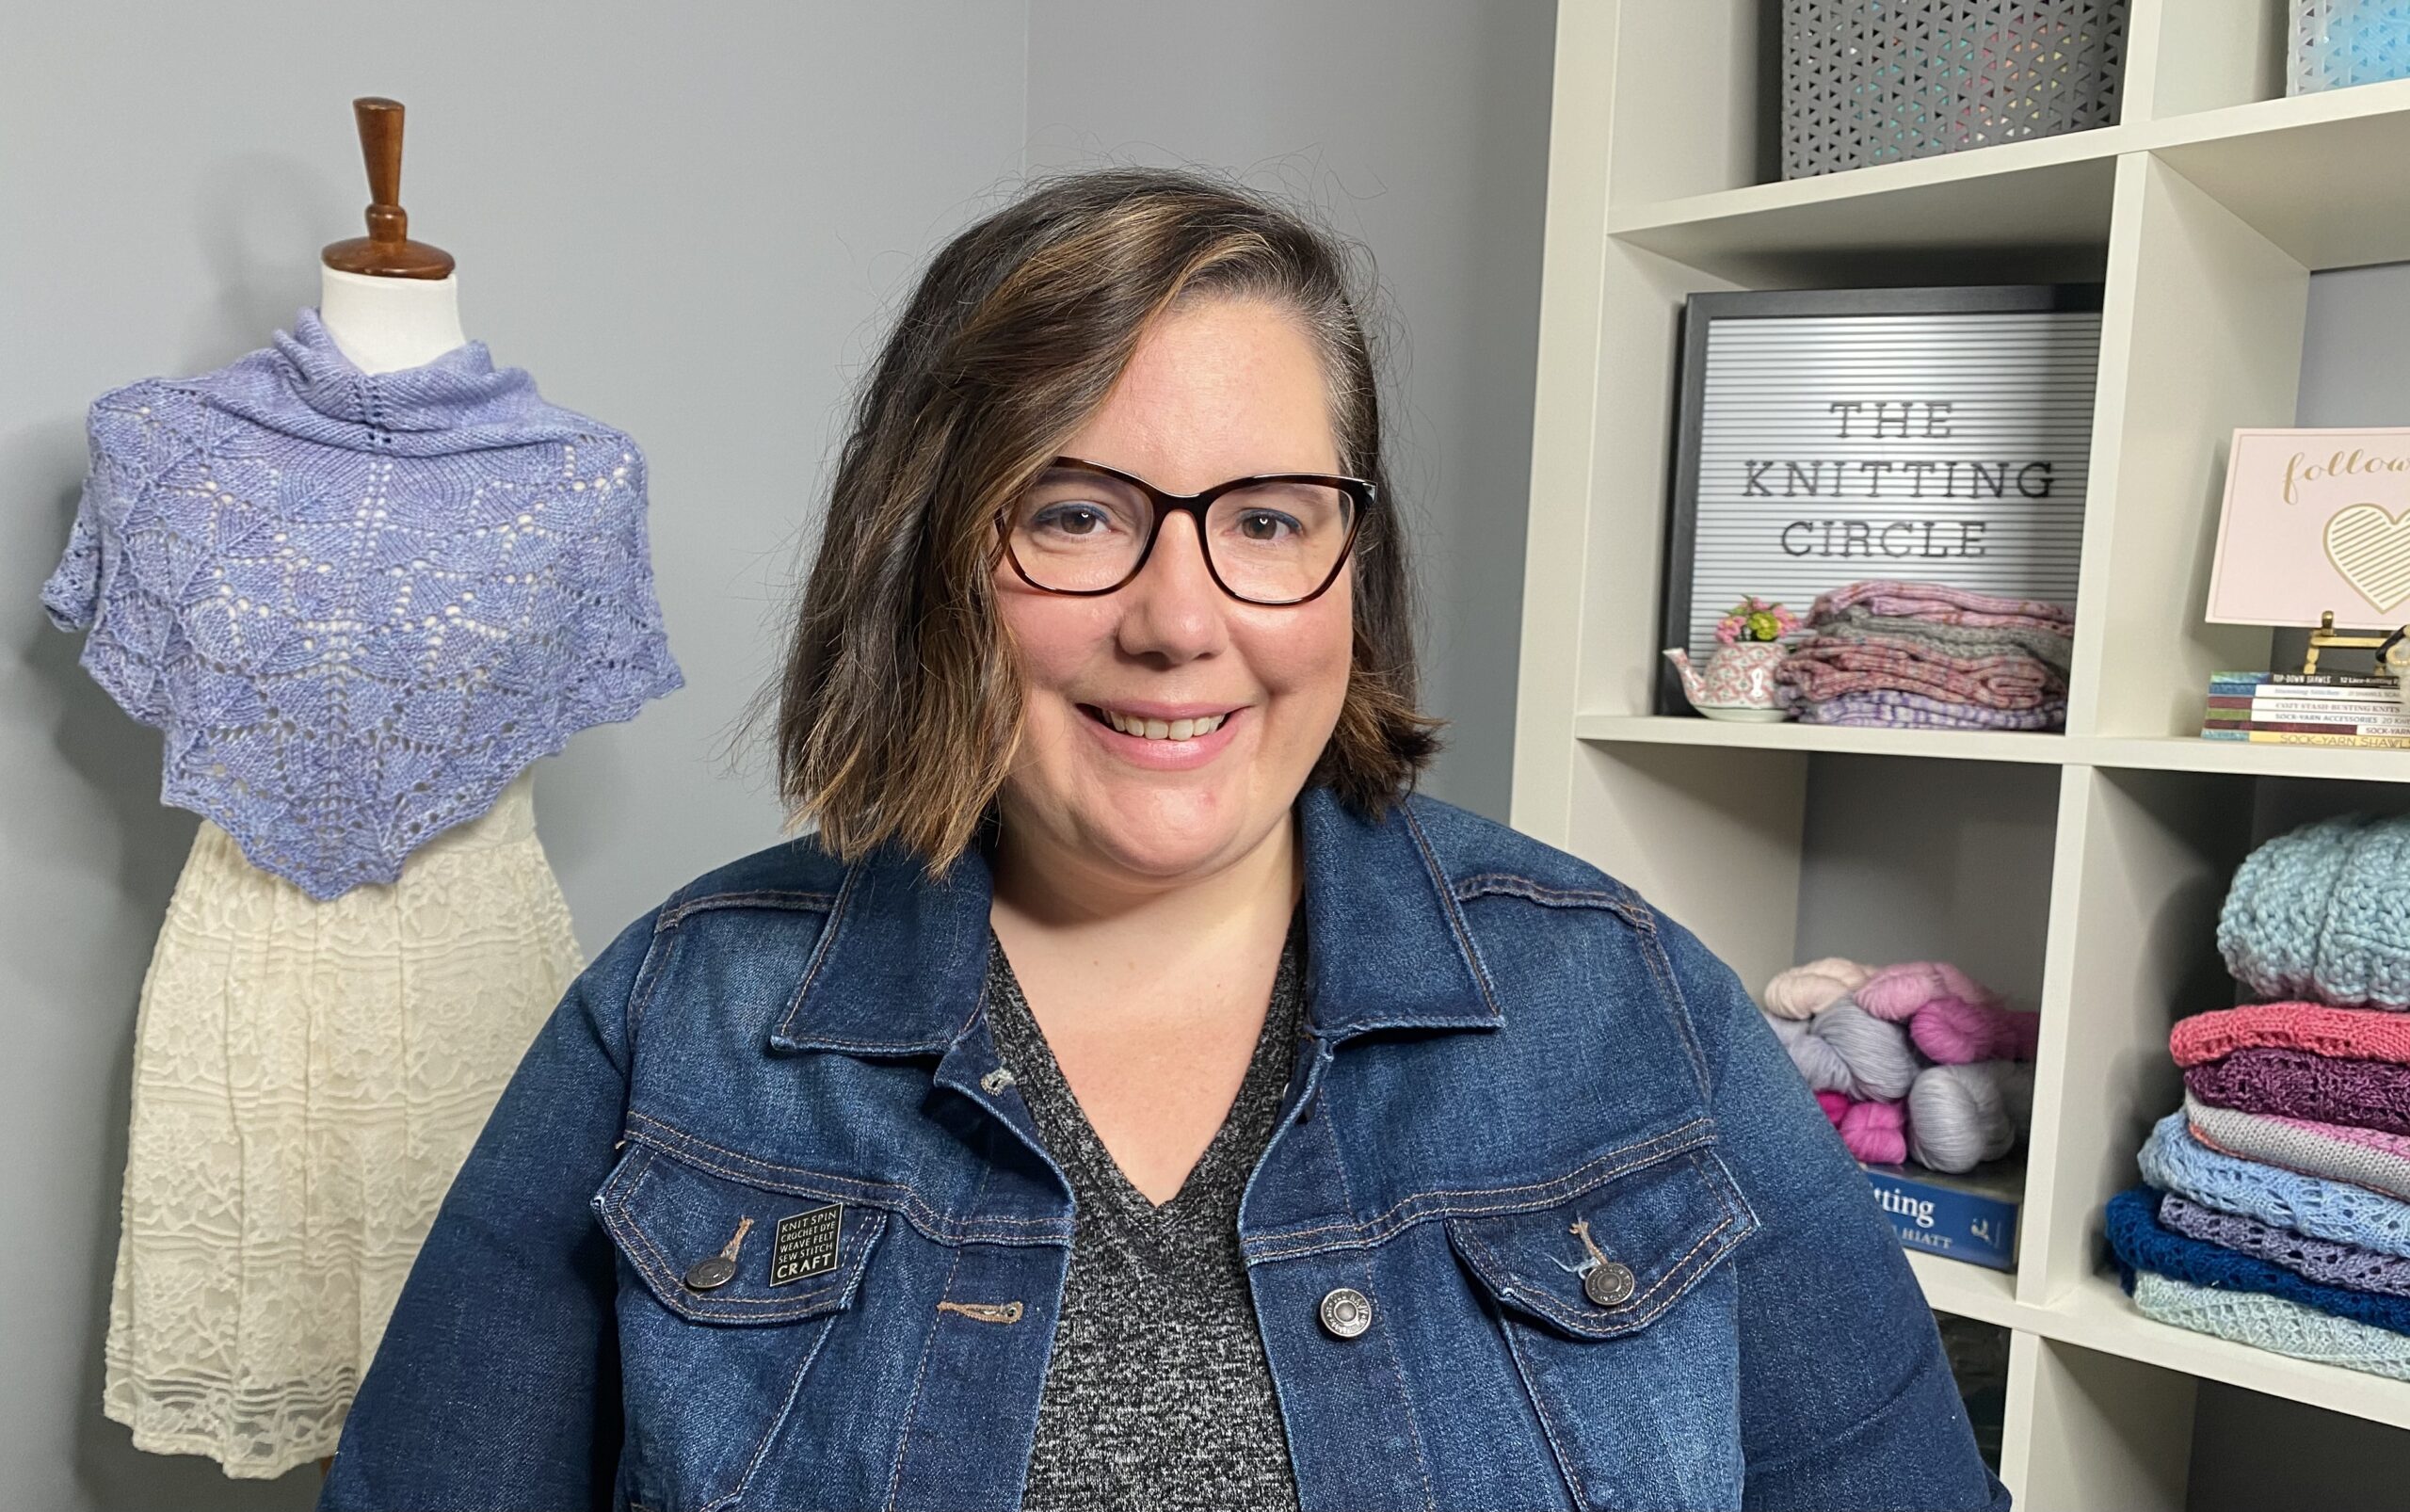
Jen LucasThe Diamond Rib Stitch Pattern is perfect for a wide range of knitting projects, from cozy scarves and stylish hats to sophisticated sweaters and blankets. Its timeless appeal and classic charm make it suitable for both traditional and contemporary designs, ensuring that your creations stand out from the crowd. In this video, knitting expert Jen Lucas demonstrates how to work one of many variations of the Diamond Rib Stitch Pattern.
DIAMOND RIB STITCH PATTERN
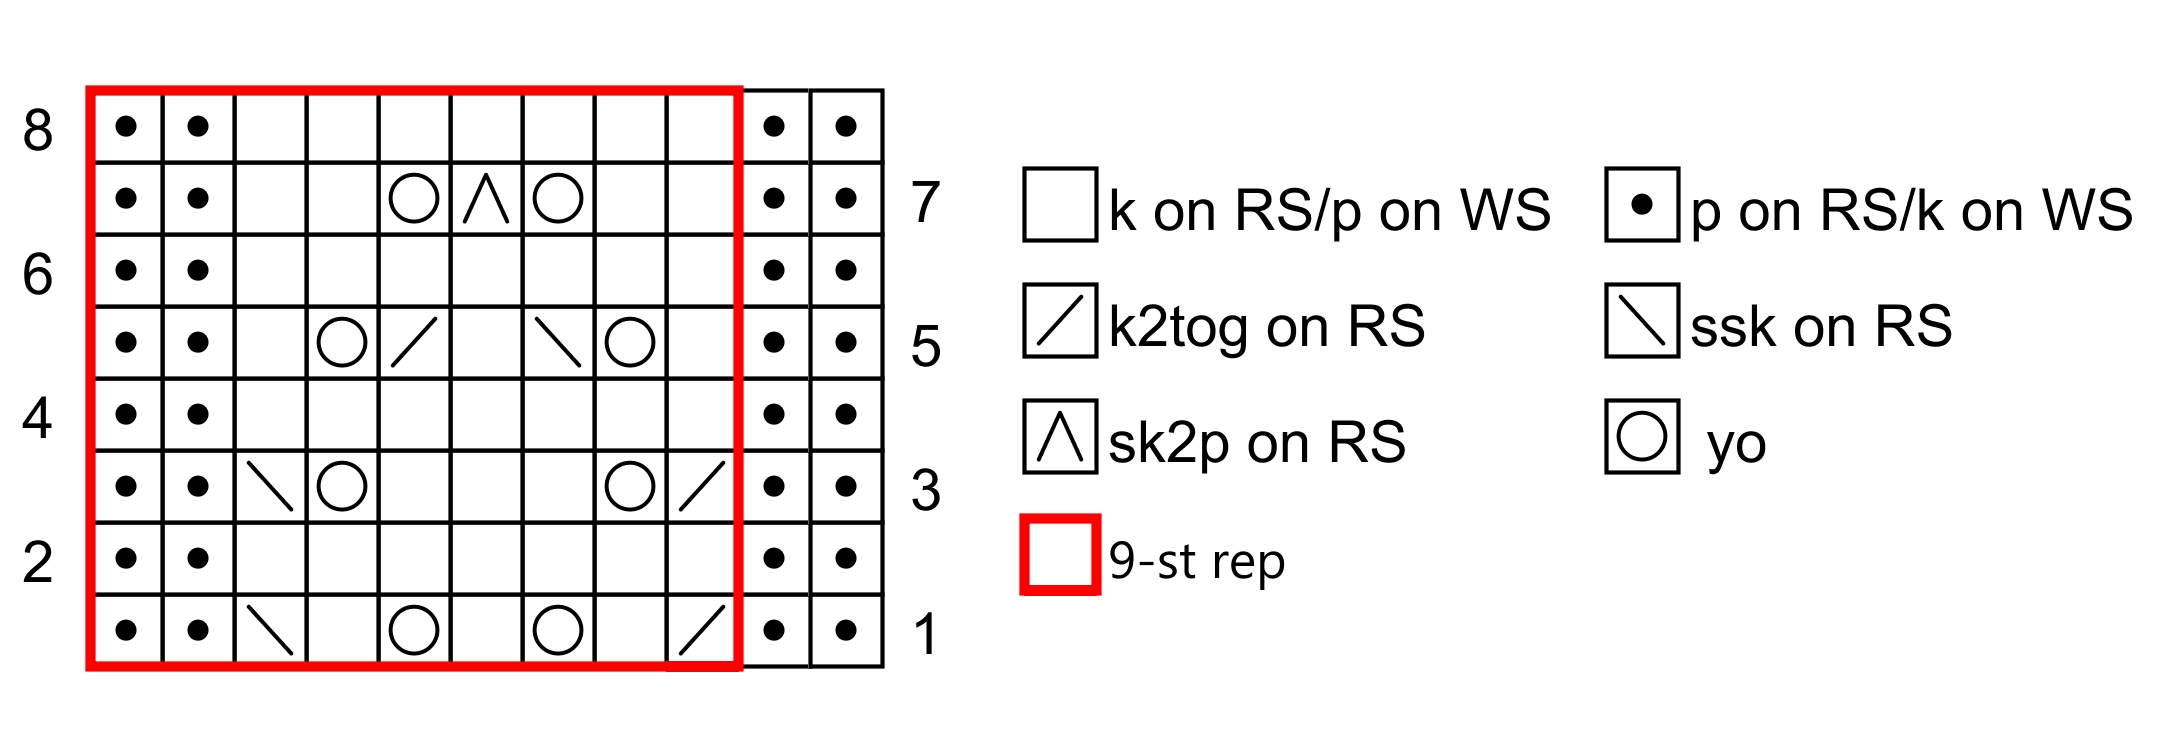
This stitch pattern is worked over a multiple of 9 plus 2 stitches as follows:
Row 1 (RS): P2, *k2tog, (k1, yo) twice, k1, ssk, p2; rep from * to end.
Row 2 and all even-numbered rows (WS): *K2, p7; rep from * to last 2 sts, k2.
Row 3: P2, *k2tog, yo, k3, yo, ssk, p2; rep from * to end.
Row 5: P2, *k1, yo, ssk, k1, k2tog, yo, k1, p2; rep from * to end.
Row 7: P2, *k2, yo, sk2p, yo, k2, p2; rep from * to end.
Row 8: *K2, p7; rep from * to last 2 sts, k2.
Rep Rows 1 – 8 for pattern.
Discover the stunning beauty of the Diamond Rib Stitch Pattern in knitting! This intricate and versatile design adds a touch of elegance to any project, making it a must-try for knitting enthusiasts. With its diamond-shaped motifs and textured ribbing, this pattern creates a captivating visual effect that will leave a lasting impression. What kind of project will use it for?
As you probably already know, there are lots of different types of ribbing stitch patterns out there. You can incorporate cables into your ribbing, you can incorporate guarded stitch slip stitches. The list goes on and on. In this video, I'm gonna show you how to incorporate some lace into your ribbing stitch patterns. And we're going to take a look at how to do the diamond rib stitch pattern.
This particular stitch pattern is worked over a multiple of nine plus two stitches and you create this very wide ribbing. So basically what's happening here is you have seven of the nine stitches in that multiple of nine is a background of stock in that stitch. So we're gonna be working our lace stitches in there and then we're gonna be separated by a column of pearl stitches here. And then in that background of that seven stitches of stuck and stitch, we're going to work this diamond lace pattern. So it's something really interesting and you might not use this as a ribbing for a project where you need ribbing on it for a uh utility.
So for example, this might not necessarily be the best stitch pattern for something like the brim of a hat. I mean, maybe it could be. Um, but here where I've worked on this bulky weight yarn, I mean, this is pretty chunky and it does have, you can see some elasticity to it but having seven stitches of stock in net followed just by those two stitches of the reverse stock in it when you pearl on the wrong side. Um, it does make for a pretty wide ribbing and it's not going to, you know, sort of snap back on itself like other traditional ribbing patterns would. But where I do think that this stitch pattern could be so useful is on a hat, but for sort of what I call the body of the hat.
So once you've moved on from the brim of the hat and now you're working, you know, the body of, of it where you're working one stitch pattern over and over and over again. I think that this would be a really good one to incorporate on a hat. And of course, you could just go on from there. I think you could make some really beautiful sweaters both for, you know, babies and Children and adults. Um This one is a very versatile stitch pattern and I'm really excited to show it to you.
So to start, like I said, you need to have a multiple of nine stitches then plus an extra two. And the reason you have the extra two is to just balance your stitch pattern on the overall fabric that you are creating. Now on this little swatch here that I'm working, I also just added an extra two stitches on to the beginning and the end just so that we um could really see those pearl stitches or the reverse stuck in that here on the right side. So I will be um working these two stitches at the start and the end um just by basically knitting them and then the rest of the stitches is where I have done my multiple of nine plus two. So um now that we've talked a little bit at the stitch count.
Now let's talk about the rows. So for this stitch pattern, it's worked over eight rows. So when you're working it into your own projects, you would just keep repeating rows one through eight until you were done. Of course, um You know, sometimes with different stitch patterns, you can stop sort of halfway through that row repeat in order to um you know, still have the stitch pattern look good. Um But for this one, you can see, I've done 28 row repeats here and each eight row repeat makes a full diamond.
And so for this particular stitch pattern, if you can, with your project, you're gonna want to finish off this stitch pattern by ending on row eight. That way you've formed a full diamond. Um Of course, if you don't do that and you stop, say after row four, you would have um just like a half diamond at the top, which could be beautiful too. It's one of those things that probably would come down to personal preference, but I just wanted to make sure to point out that it takes all eight rows to make that full diamond. So let's go ahead and get started.
So I have the chart here just on my tablet. Um And you can see we have this red box here and that red box is marking our nine stitch repeat. And then um we're just working those extra two stitches there right at the side. The plus two, that's the ones that are outside of the box. So I'm just doing my two little border stitches and now I'm ready to begin with the pearl two.
And then we are going to knit two together, knit one yarn over twice. So knit one yarn over knit, one yarn over knit one and then slip, slip knit. Once our slip slip knit is complete, we're gonna pearl too. And now we have worked this entire thing. So we worked our pearl two.
We worked all of this in the box. Now we're going to work another repeat. So we're gonna go back to the beginning of the red box here and we're gonna start again with the knit two together. So I'm gonna bring the yarn to the back because I was pearling and now I'm gonna knit, knit two together, knit one yarn over twice. So knit one yarn over knit, one yarn over knit, one slip slip, knit and then pearl two.
And again, you would just keep repeating that. And then I'm just gonna finish off my swatch with these last two stitches. I'll just knit them. And now for row two and every wrong side row it is the same for the stitch pattern. We are going to knit two pearl seven and then repeat that ending with the knit too.
So that's a pearl one, 23, 45, six and seven. And knit too. And then again, PERL seven and it too. And every wrong side rows. So rows 246 and eight will be doing the same thing um on all those wrong side rows.
So coming to row three, now when we're ready to work the stitch pattern, we're just going to pearl two knit two together yarn over knit 31, two and three yarn over ssk that's slip, slip knit. So slip as if to knit slip, as if to knit, bring your left needle in. So you can knit those two stitches together through their back loops and then pearl two. And we're gonna just repeat that all again, knit two together yarn over knit three yarn over slip slip knit and pearl two. And after that, we're just ready to work another wrong side row for the wrong side row.
We're going to knit two pearl seven across ending with the pearl two. So we've completed row four and we're ready to work row five. So if we just take a quick little pause here, you can see now after row four, we have created that half of a diamond there. So we had, if you recall from row one, we did the knit one yarn over twice. Well, the second knit one here is that center stitch here.
So we've got the yarn overs on either side and then we continue forming the diamond because on row three, we had done a yarn over knit three yarn over. So that just starts to make that little diamond shape there. Now, on row five, we're gonna start uh working the stitch pattern such that we're starting to decrease at the top for the top of the diamond. So as always, we're starting and ending with that pearl too. So pearl two and then knit one yarn over slip slip, knit N one, knit two together yarn over knit one, pearl two.
And then we're ready to do that all again. Knit one yarn over slip slip, knit net, one knit two together yarn over knit one pearl two. And that's row five. We're on to row six, wrong side, row. We're just doing the same thing we've been doing the whole time.
And something to keep in mind on the wrong side rows is you're simply knitting the knits and pearling the pearls. And so what do I mean by that? What I mean is if it looks like a knit stitch as in, it's gonna have this v we're gonna knit it and if we see the bump here, we're going to pearl it. Now, of course, we do have these yarn overs in between. Um, but we're gonna be starting and ending this section um where we have these pearl bumps at the beginning of this little section here.
So it's pretty easy to read your knitting in this case. So here we have two knits together and then I see, OK, that's a pearl stitch. So now I know this is where I'm gonna do my pearl seven one 23 for five six and seven. And then you can see I'm back to where I have my stitches that look like knit stitches with the v. So I know I'm in the right place for my knit too and then I'll go back to my pearl seven.
So this one is a little bit easy to read, I think. Um you know, uh it's easy to sort of maintain that overall ribbing pattern. Um Especially when you're working on that wrong side. You can very clearly see where these are the, this is where you're gonna be doing your knit stitches on the wrong side. And this is, and here's where you'll be doing your pearls.
So it's one of those things after a repeat or two you're not even gonna be looking at your pattern anymore. Um, definitely for the wrong side. And this is one of those, honestly, after a few repeats, you might be able to not look at your chart or, um, written instructions at all. Um, which is kind of nice because the less you have to stop to look at your pattern, the quicker you can get. So now I'm on row eight.
So I've started with my pearl two here and then I'm gonna knit two yarn over and now I'm gonna do an SK two P or sometimes you'll see it as slip one knit two together, pass the slip stitch over. And I want to talk about this a little bit because I've talked about this stitch in a lot of other videos and um my opinion has sort of changed on it. So I want to share with you my thoughts on this particular decrease. So previously, I used to always slip my stitch pearl wise when I was doing the slip one knit two together, pass the slip stitch over or I often abbreviated it in my patterns. Like I said, as SK two P, I would always slip the stitch pearl wise because when I first started knitting before I was a designer and an instructor, you know, I learned the rule if they don't tell you otherwise you slip a stitch as if to pearl.
And so when I first came across this stitch in a stitch pattern. It was simply described as slip, one knit, two together, pass the slip stitch over. Well, it didn't say which way to slip the stitch. So I just then, you know, made that assumption that we learn if they don't tell you, it's slip pearl wise and I always slip my stitch pearl wise. But if you think about it, if you slip the stitch knit wise, what ends up happening is you're turning that stitch the other way, you're reorienting the stitch the other way.
And so it actually, especially in things like lace and things like that, it makes a little bit more sense to actually slip that stitch as if to knit. But I spent the last 20 years of my knitting career, um you know, slipping this stitch as if to pearl always. Um And it's just been recently that I've decided that actually this is one little tiny detail that I like it better in lace patterns when I slip it knit wise. So I encourage you to try it both ways and I'm going to demonstrate it slipping the stitch knit wise. The most important thing at the end of the day is, does it really matter?
No. And I actually did take sort of an informal poll online just to see what people did because I got very curious about how this whole thing worked and what people did and it really truly was 50 50 if people were slipping the stitch as if to pearl or slipping the stitch as if to knit. So just know that going into it, it's not wrong if you slip as if to pearl. Um, because half of the knitters, the half of the knitters that told me which way they were doing it, told me they were slipping it as if to pearl. But I'm gonna slip as if to knit now because this is now my preferred way to do it.
Um When I'm working lace, like I said, and the main takeaway here is just be consistent. Don't flip back and forth between slipping sometimes as if to knit on the stitch and then other times slipping as if to pearl for your entire project, just make sure you're using the same slip stitch every time. So again, we did that yarn over. So I have my yarn over here and now we're ready to do that SK two P. So I'm gonna slip that stitch as if to knit, then knit two together and then pass that slip stitch over.
And so that just really makes this particular stitch, just lie down nice and flat and it just make it just literally, it just makes a little bit more sense to have to have the top of your diamond come together in this way in my eyes. Again, you might not think that's a big deal and then slip it however you want. So now that we did our SK two P, we're gonna yarn over and then knit too and then pearl two and start that all over again. Knit two yarn over sk two P. So slip one and we're doing that knit wise knit two together and then pass the slip stitch over.
So it's just like doing a, a bind off. I'm taking that second stitch the slip stitch and I'm passing it over the other stitch yarn over knit too. And our stitch pattern with the pearl two. And then of course, the wrong side is just the same as all the other wrong side. Uh rows.
So you would just work row eight the same way you worked all the other rows and you would be completely done with your diamond rib pattern. So let's just take a look here. Isn't that such a nice stitch pattern? I like it for so many different reasons. I love the diamonds, but I also love the little effect you almost get here where it kind of almost like bubbles out a little bit as you go.
So again, I think that for me, this is a new favorite stitch pattern and hopefully it is for you too.

Share tips, start a discussion or ask other students a question. If you have a question for an expert, please click here.
Already a member?
No Responses to “Diamond Rib Stitch Patterns”